Choose a 20‑35 L pack for a full‑day hike, fit it snugly so the hips bear about 80% of the load, and use lightweight fabric with multiple pockets. Fill a 2‑L hydration bladder (or 3‑L in heat), stash a 1‑L bottle, and keep energy bars, trail mix, a compact emergency ration, and a small first‑aid kit in side pockets for quick grabs. Layer a moisture‑wicking base, an insulating mid‑layer, and a packable waterproof shell, adding a hat, gloves, and gaiters if needed. Keep your map, compass, spare headlamp, and extra batteries in an easy‑reach pocket, and store heavier items near your back and hips while filling gaps with soft gear and tightening straps to avoid top‑heaviness. Compression sacks and dry bags shrink bulk and protect gear, and a final fit check ensures stability—continue for more detailed tips.
TLDR
- Choose a 20‑35 L pack with a breathable hip belt; fit it so ~80 % of weight rests on the hips.
- Fill a 2‑L hydration bladder, carry a 1‑L bottle, and stash energy bars, trail mix, and an emergency ration in side pockets.
- Layer clothing: moisture‑wicking base, insulating mid‑layer, and a packable waterproof shell; add hat, gloves, and gaiters for extremes.
- Keep map, compass, and a spare headlamp in an easily reachable pocket; store a backup light and spare batteries in a dry bag.
- Use compression sacks and dry bags to shrink bulk, place heavy items near hips, and tighten straps to eliminate top‑heaviness.
Choose the Right Day‑Hike Backpack Size and Features
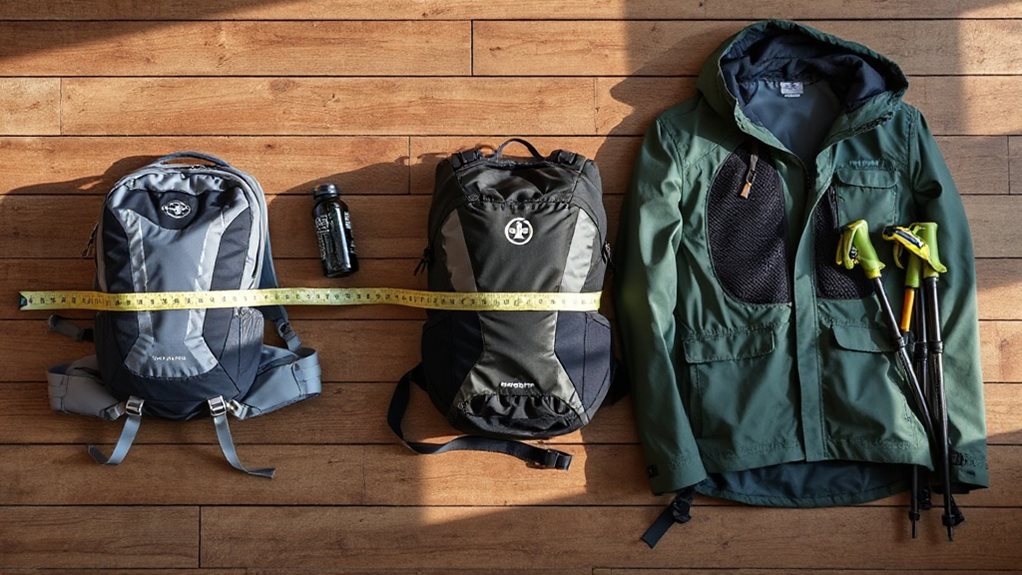
Choosing the right day‑hike backpack starts with matching its capacity to your typical hike length and gear needs. Aim for 20‑35 L for most full‑day trips, as that sweet spot holds food, layers, and a camera without weighing you down. If you only trek 3‑5 miles, 11‑20 L suffices; under 10 L works for ultra‑light runs. Look for lightweight fabrics, multiple pockets, hydration sleeves, and removable day packs to keep essentials accessible and movement unrestricted. Proper fit ensures that 80 % of the load is transferred to the hips, reducing shoulder strain. In winter conditions you may want to account for additional bulk from layers and emergency gear, since deer often shift to woody browse and other seasonal food sources.
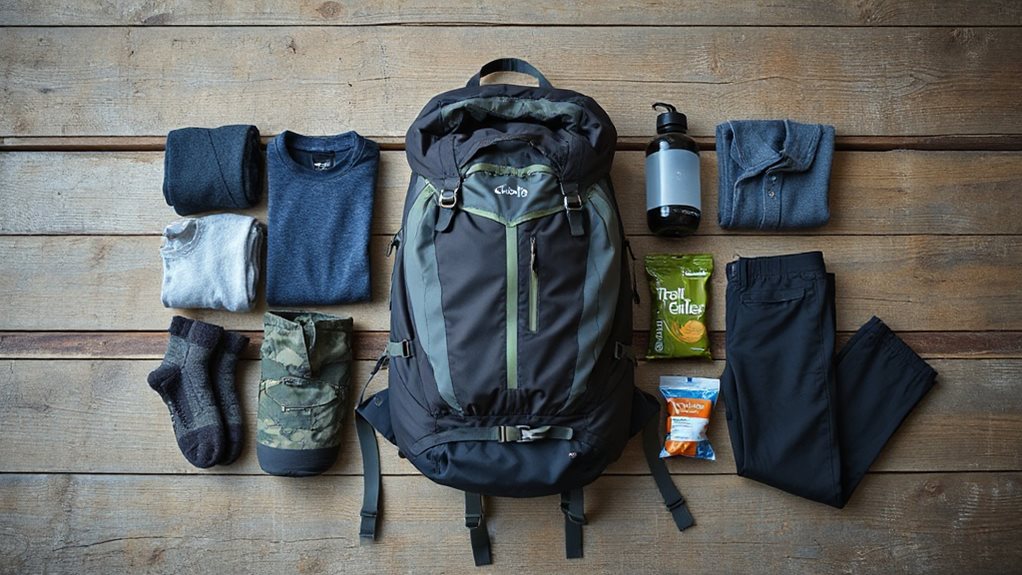
Pack Day‑Hike Water, Snacks, and Emergency Rations
After picking a backpack that fits your hike, the next step is to load it with water, snacks, and emergency rations. Fill a 2‑L bladder for moderate days, or a 3‑L one if you expect heat or no water sources; keep a 1‑L bottle handy for extra thirst. Pack energy bars and a lightweight trail mix in side pockets, and add a compact emergency ration packet—think high‑calorie, non‑perishable food and a small first‑aid kit—so you stay fueled and safe without sacrificing freedom. Stop immediately when off course to prevent worsening disorientation and reset your position before moving.
Layer Day‑Hike Clothing for Weather‑Proof Comfort
You’ll start with a snug base layer that wicks sweat, then add a mid‑layer for insulation and finally a waterproof outer shell for wind and rain protection.
Keep a lightweight rain jacket and a packable fleece in your pack for quick swaps when the weather shifts, and don’t forget a hat, gloves, and gaiters for extreme conditions.
Match your mid‑layer thickness to expected temperatures and activity level, and consider carrying a compact packable fleece for versatility.
Layering Basics for Comfort
Ever wondered how a simple three‑layer system can keep you comfortable from a cool morning climb to a sudden afternoon storm? Start with a moisture‑wicking Merino base that pulls sweat away and resists odor, then add a breathable fleece or lightweight synthetic mid‑layer for warmth, and finish with a waterproof shell that blocks wind and rain. Adjust with zippers, sleeves, or a hat, and you stay free, dry, and ready for any change.
Quick‑Swap Weather Essentials
How can you stay comfortable when the trail temperature flips from a cool morning to a sudden afternoon storm without stopping? Zip your fleece for cooling, pull sleeves up for ventilation, and stash hat and gloves in pockets for instant drop. Add a light wind jacket or technical shell at rest, then reverse—zip up, don hat and gloves quickly. This ultralight, 25‑oz system lets you adapt freely, keeping you moving.
Protective Gear for Extremes
When temperatures swing from a crisp dawn to a sudden afternoon storm, the right clothing layers become your portable weather shield. Choose a moisture‑wicking base, long or short sleeve, and liner socks to stay dry; add a breathable mid‑layer fleece or Polartec for warmth without overheating; top with a waterproof, breathable outer shell featuring a hood, taped seams, and zippered pockets.
Adjust for cold or warm conditions, and pack gloves, hat, and breathable socks for full protection.
Organize Day‑Hike Navigation, Lighting, and Emergency Gear
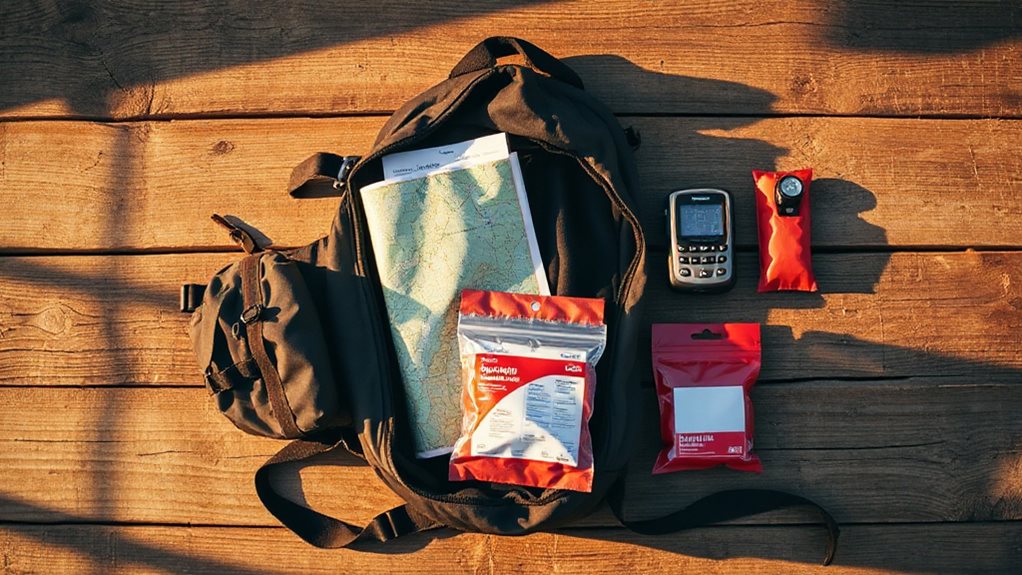
You’ll want to keep your map, compass, and a spare set of batteries for your headlamp within easy reach, so a side pocket or top‑of‑pack pouch works best.
Pack a backup light—like a small LED or a second headlamp—in an external pocket, and make sure the batteries are stored in a waterproof bag to avoid moisture damage.
Consider also carrying a compact first aid kit and knowing basic emergency procedures to stay self-sufficient and safe, with an emphasis on first aid and how to use it.
Map Essentials & Compass
If you’re heading out for a day hike, a reliable topographic map and a well‑understood compass are the backbone of safe navigation, especially when technology falters or weather turns.
Choose a detailed topo map covering ridgelines, drainages, and corridors; store it in a waterproof bag or Ziploc.
Pair it with a sturdy backpacking compass, practice bearings, and keep both handy for quick reference.
Headlamp Batteries & Spare Light
Where does your headlamp go in the pack, and how do you keep its power ready for the trail?
You’ll want the headlamp and its fresh batteries or a fully charged rechargeable unit at the top of your day‑hike backpack, ideally in a dedicated pocket or a color‑coded dry bag, so you can grab it without rummaging.
Pack spare AA cells, a backup flashlight, and a 3‑in‑1 whistle‑light in the same zone, test them before you leave, and keep everything within reach for dusk navigation or emergencies.
Add Essential Day‑Hike Accessories and Tools
What tools and accessories should you reach into before you set off on a day hike? Pack a waterproof topo map, compass, and GPS app for direction, plus a watch to track time.
Slip in a headlamp with spare batteries, a lighter, and a phone case for emergency light.
Add sunscreen, sunglasses, bug spray, a whistle, trekking poles, a multitool, duct tape, water‑treatment tabs, a compact first‑aid kit, electrolyte chews, and an emergency bivy.
Also include a lightweight backpack cover for rain protection to keep your gear dry and functional on wet trails (backpack cover).
Arrange Day‑Hike Items for Quick Access and Balanced Weight

Ever wonder how to keep your day‑hike pack stable while still reaching for essentials in a heartbeat? Place heavy gear—fuel, food, water bottles—close to your back and hips, low and central, then pair equal weights side‑by‑side for lateral balance. Keep first‑aid, snacks, flashlight, and rain jacket in top or side pockets for instant grab. Fill gaps with soft items, tighten straps, and avoid top‑heavy loads.
Use Compression Sacks and Dry Bags to Maximize Space
How can you squeeze more gear into a day‑hiking pack without sacrificing comfort? Use compression sacks to shrink bulky items—sleeping bags, insulated jackets—by expelling air, choosing 3L‑20L sizes that fit your load, and roll‑top closures for waterproofing.
Pair them with Ultra‑Sil dry bags for clothes, leveraging semi‑transparent panels and quick‑release buckles.
Cinch straps keep everything tight, preserving space while staying lightweight and organized.
Test Fit and Adjust Your Day‑Hike Pack for Stability

Ever wondered why your pack feels like a tug‑of‑war after a few miles? Slip the pack on, loosen every buckle, then tighten the hip belt directly over your hip bones, just above the glutes, to shift most weight to your pelvis. Adjust shoulder straps so they sit snugly without restricting arm swing, angle load lifters upward 45°, and set the chest strap an inch below the collarbone, allowing deep breaths while keeping the pack stable.
Final Note
By choosing the right size, packing water, snacks, and emergency rations, layering clothing for the weather, and organizing navigation, lighting, and safety gear, you’ll stay prepared and comfortable. Use compression sacks and dry bags to maximize space, arrange items for quick access and balanced weight, and fine‑tune the fit for stability. Following these steps ensures your day‑hike backpack works efficiently, letting you focus on the trail instead of gear hassles.


