You should know three visual and three audible signals that work in any wilderness rescue. In daylight, orange smoke from high ground or a bright panel can be seen up to three miles; at night, a fire or flashlights in an SOS pattern reach farther. A three‑blast whistle—three short bursts, pause, repeat—provides a universal distress call, while three gunshots, horn blasts, or rhythmic log‑strikes serve the same purpose when you lack a whistle. Ground‑to‑air symbols like a large “X” or “V” made from contrasting material guide aircraft, and a portable beac on or satellite messenger can alert rescuers instantly. Mastering these basics will prepare you for any emergency situation.
TLDR
- Use orange smoke from high ground during daylight; bright fabrics or panels boost contrast for visibility up to three miles.
- Emit three short whistle blasts (or three gunshots/horn blasts) spaced five seconds apart, repeat after a minute for universal distress signaling.
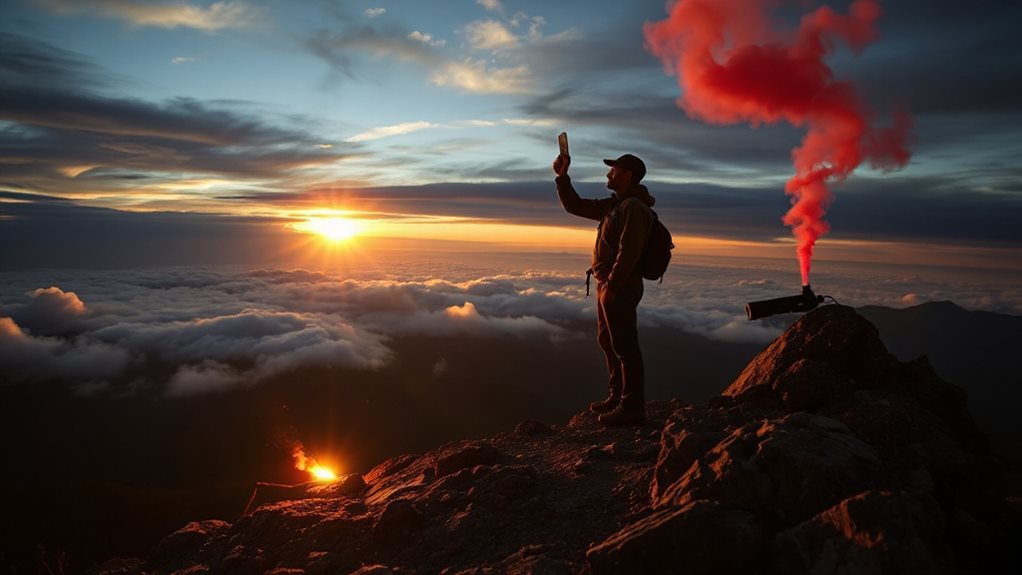
- At night, employ signal fires or flashlights in SOS patterns; combine with reflective gear or mirrors if rain limits smoke.
- Create ground‑to‑air symbols (V, X, Y, N, arrow) at least 10 ft wide and 8 ft tall using contrasting materials for aerial detection.
- Carry a high‑decibel whistle, a loud horn, and a compact strobe or flare set; use them together with smoke or fire for maximum range.
How to Choose the Best Rescue Signal for Your Situation
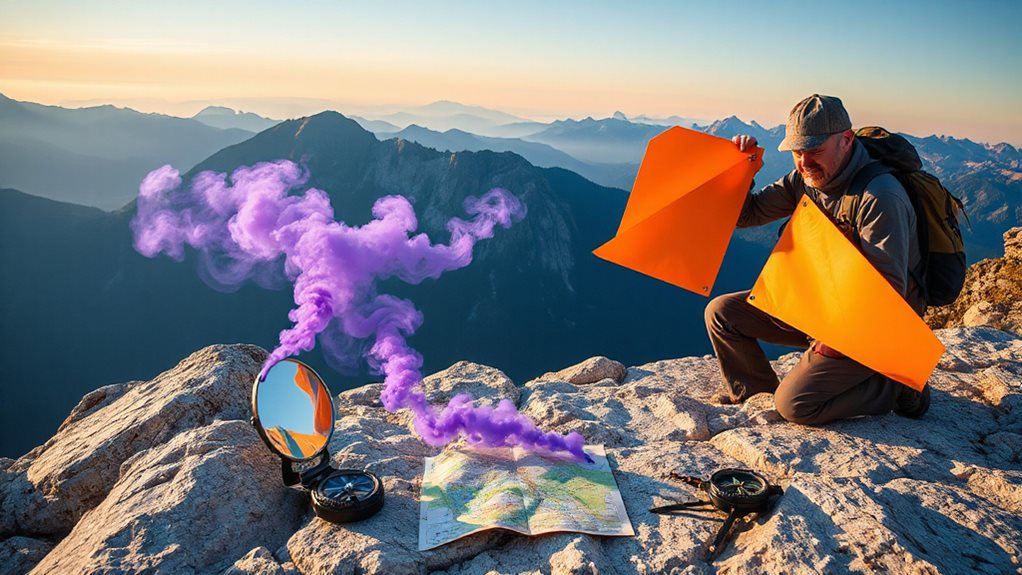
How do you pick the right rescue signal when you’re stranded? First, assess daylight versus night, terrain, and what you have. In daylight, orange smoke from high ground works up to three miles, while bright fabrics or panels enhance contrast. At night, signal fires, flares, or flashlights in SOS pattern reach farther. Use mirrors or reflective gear when rain limits smoke, and choose high ground to outrun forest cover. Orange smoke is most effective in open areas with high contrast during the day. Maintain a stable environment and avoid sudden changes that can worsen conditions for anyone waiting to be rescued, especially in hot or cold weather where temperature control matters.
How to Make the Universal Three‑Blast Survival Whistle Signal
Ever wondered why three short, loud blasts on a whistle have become the universal distress call? Insert a pealess whistle firmly, take a deep breath, then blow a three‑second blast while counting “one‑two‑three.” Pause, breathe, repeat two more times, then wait a minute for a response. If no reply, repeat the pattern, using high‑decibel whistles and open spaces for maximum reach. Bring extra layers and warm fluids to stay safe in cold conditions and prevent hypothermia by drinking warm drinks before and after signaling.
How to Produce Audible Survival Signals: Gunshots, Horns, and Voice Calls

You’ll fire three shots spaced about five seconds apart, giving listeners time to locate the source and recognize the distress pattern. When you use a horn, blast it three times with short pauses, letting the loud, sharp tones cut through foliage and echo off terrain.
If you’re without a gun or horn, you can strike a log or rocks in the same three‑signal rhythm, ensuring each strike is distinct and spaced to avoid sounding like random noise. Consider carrying a compact, loud horn for emergencies—especially when operating from a kayak-secured position where stability and quick signaling are crucial.
Proper Gunshot Timing
Ever wondered why three gunshots, spaced just right, are the go‑to distress signal in the wild? You fire the first blast, wait five seconds, fire the second, pause another five, then fire the third. This rhythm separates you from hunters, lets rescuers locate direction, and conserves ammo.
Choose echo‑rich spots—gorges, open ridges—while staying hidden, and avoid densely forested canyons where sound scatters.
Effective Horn Signaling
After conquering the timing of three gunshots, you’ll find that an air horn offers a quicker, less taxing way to broadcast distress. Blow three short blasts, pause, then repeat at regular intervals, aiming toward trails or open land. Pair horns with smoke or flashlights, test before you go, and alternate with shouts when you suspect rescuers nearby. This loud, piercing pattern cuts through forest noise, conserves energy, and maximizes rescue chances.
How to Build Day‑time Smoke Signals & Night‑time Fire Survival Signals
You’ll start by picking green material—damp leaves, grass, or moss—to produce thick white smoke, then stack your fire in a triangular or teepee shape so the flames and smoke rise straight up, making the signal visible from far away.
At night, use dry tinder and fuel for intense bursts, arranging the same triangular structure to keep the fire stable and the flames bright, and add a reflective surface or a torch‑filled green stick to enhance visibility.
Choose Smoke Materials
Choosing the right smoke‑producing materials is the first step toward reliable daytime and nighttime signals, and it’s easier than you might think once you understand how each type behaves. Use damp leaves or green pine boughs for thick white daytime smoke, and add pine needles or birch bark as quick‑ignition tinder. For night, mix resin‑soaked pine sticks with dry twigs for an intense blaze, and keep a small ground fire nearby for continuous visibility.
Build Triangular Fire Arrangement
Having gathered the right smoke‑producing materials, you now arrange them into a triangular fire layout that maximizes visibility for both daytime smoke and nighttime flames. Choose an open clearing or high ground, clear nearby foliage, and space each fire about 25 meters apart. Build teepee‑style pyres with tinder, kindling, then fuel wood, and keep them ready to ignite. The three‑point triangle signals distress clearly from air and ground.
Optimize Night‑time Visibility
How can you make a night‑time fire signal stand out when darkness falls? Elevate a teepee fire on a tripod, use dry tinder and kindling for a tall, bright flame, and keep a ground fire nearby for redundancy.
Choose a high, open spot, clear wind‑blocking debris, and add a mid‑level support table for airflow. Use pine branches for side ventilation, and ensure a quick‑extinguish plan.
How to Arrange Ground‑to‑Air Survival Symbols for Aircraft Visibility
Ever wondered how to make your ground‑to‑air symbols pop for an overhead aircraft? Choose a flat, open spot on high ground, then lay bright parachute strips or dark logs to form a V, X, Y, N, or arrow at least 10 feet wide and 8 feet tall. Use contrasting colors—light on sand, dark on snow—so pilots see you from altitude. Keep arms 1 meter square, refresh the layout, and watch for wing rocking or landing‑light flashes confirming detection. Build symbols at least 10–20 feet long using rocks, logs, or trampled grass to ensure aerial visibility from altitude.
How to Use Flashlights, Mirrors, and Flares for Light Survival Signals
A flashlight, mirror, or flare can turn a dark wilderness into a signal that pilots and rescuers spot from miles away, and mastering a few simple techniques lets you signal efficiently without wasting precious resources.
Use SOS flashes—three short, three long, three short—in bursts, or a strobe at 60 rpm; aim a compact mirror with a sighting hole, sweeping sunlight in groups of three; launch three flares in a triangle from high ground, keeping them dry for instant deployment.
Repeat each pattern regularly.
Longer signaling devices or techniques can be more effective but may drain batteries faster, so manage power and conserve resources.
How to Deploy Portable Electronic Rescue Signals (PLBs, Satellite Messengers, Panels)
After mastering light‑based signals, the next step is to add electronic lighthouses to your safety toolkit. Choose a PLB, register it with NOAA, and keep it within reach; when you activate it, the 406 MHz beacon sends a 5‑watt distress pulse to COSPAS‑SARSAT, while a 121.5 MHz homing tone guides rescuers. GPS‑enabled units deliver 100‑meter accuracy in minutes, but require clear sky. Satellite messengers work similarly, offering two‑way text when you have a line‑of‑sight. Panels can broadcast location to nearby devices, extending your rescue network. Activate only in true emergencies; the signal will broadcast for 24 hours, so stay calm and let professionals locate you.
Final Note
Remember, the right signal can mean the difference between a quick rescue and a prolonged ordeal, so match your method to the environment, time of day, and resources you have. Keep a whistle, a mirror, and a basic fire‑making kit in your pack, and learn how to use a PLB or satellite messenger as a backup. Practice each technique regularly, stay calm, and signal confidently—help will arrive faster when you’re prepared.


