Multiply your height in centimeters by 0.68 to get a solid starting length—so a 170 cm hiker begins around 115 cm, then round to the nearest 5 cm if you prefer fixed‑length poles. Test the 90‑degree elbow position: the pole tip should rest beside your foot, your forearm parallel to the ground, and your grip at waist level. Add 5–10 cm for downhill stability, shorten the same amount for steep climbs, and use an adjustable telescoping pole with a reliable lock system to fine‑tune on the trail. Quick‑lookup charts confirm the estimate, and a final safety check ensures comfort before you set out, and more details await if you keep exploring.
TLDR
- Measure your height and multiply by 0.68; round to the nearest 5 cm for a fixed‑length pole.
- Verify the result with a height‑to‑pole chart or online calculator, adjusting for terrain or personal comfort.
- Aim for a slight elbow bend (≈90°) when the pole tip rests beside your foot on flat ground.
- Shorten the pole 5‑10 cm for steep uphill sections and lengthen 5‑10 cm for downhill or uneven terrain.
- Use telescoping poles with quick‑release locks to fine‑tune length in small increments for optimal ergonomics.
Calculate Starting Pole Length With the 0.68 Formula
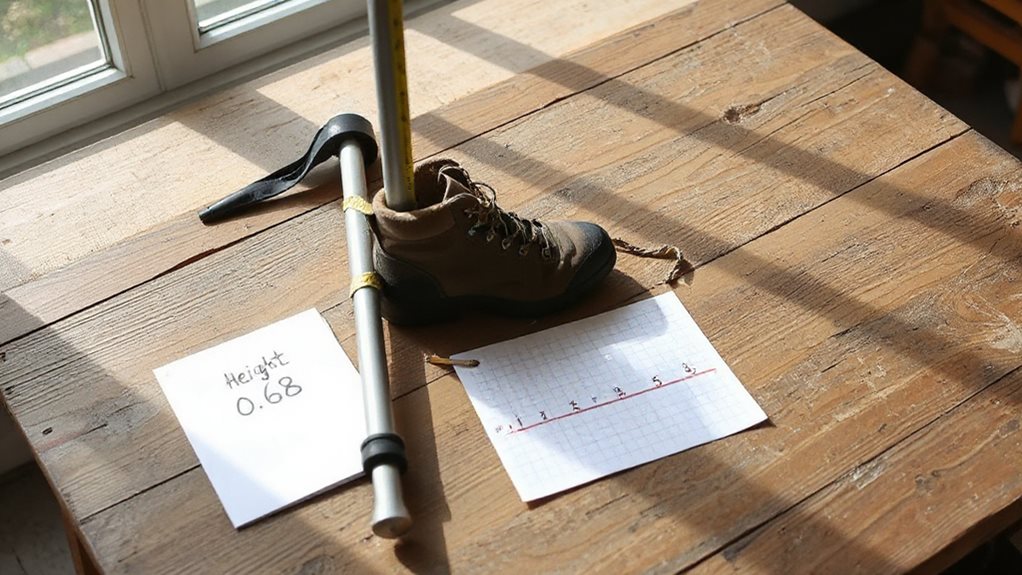
How do you determine the right starting pole length for your next trek? Measure your height in centimeters, then multiply by 0.68; this gives a baseline pole height. For example, 170 cm yields 115.6 cm, which you round to the nearest 5 cm for fixed‑length poles. Verify the result with a chart or online calculator, and adjust slightly for terrain or personal comfort. The recommended length is based on achieving a 90‑degree elbow when the poles are held at a right angle. You can also check your setup for proper ergonomics to avoid strain on long hikes.
Test the 90‑Degree Arm Position to Fine‑Tune Length
You’ll start by bending your elbow until it forms a true 90‑degree angle, making sure the pole tip rests lightly beside your foot on flat ground; this tells you whether the grip height matches your arm’s natural rest.
Next, check that the pole’s length lets your upper arm stay against your body without forcing your shoulder or wrist into a lock, confirming proper arm angle alignment.
If the grip feels too high or low, adjust the telescoping sections in small increments until the position feels relaxed and balanced.
Bring reusable containers and utensils to minimize disposable waste and reduce campground trash by packing smart, such as using reusable utensils instead of single‑use items.
Arm Angle Alignment
Ever wondered whether your trekking poles are truly the right length for flat terrain? Test the 90‑degree arm position: stand upright, grip poles, let elbows bend naturally. If your elbows form a right angle, you’ve hit the sweet spot; slight adjustments—just under 90 degrees—fine‑tune force transfer. Keep the angle consistent, experiment on the trail, and enjoy unrestricted, efficient movement.
Grip Height Verification
After confirming that your elbows form a near‑right angle on flat ground, the next step is to verify the grip height so the pole truly supports that posture. Hold the pole tip near your foot, keep your forearm parallel, and slide the handle until it meets the fist you place on your forearm at 90°. Lock the adjustment, test without gripping, and ensure the grip sits at waist level, preventing overstretching while letting you move freely.
Add 5–10 cm for Downhill Terrain
Why should you add 5–10 cm to your pole length on downhill terrain? Extending your poles gives you stability, keeps forearms near a 90‑degree angle, and eases knee strain when you’re carrying a heavy pack.
The extra length lets you plant poles without over‑reaching, maintains balanced posture on steep ledges, and reduces forward lean, letting you descend freely while protecting joints.
Shorten Poles for Uphill Climbs
How much should you shorten your trekking poles for an uphill climb? Reduce them by five to ten centimeters from your flat‑terrain setting, adjusting in small increments as the slope steepens. This fine‑tuning lets your arms push down harder, eases leg strain, and matches the pole length to a forward‑leaning posture. You’ll gain better use, smoother propulsion, and less backpack‑induced back pressure.
Read the Height‑Based Chart for Quick Lookup
First, locate your height on the chart and note the corresponding pole length, making sure the metric conversion matches your preferred units.
Next, double‑check the suggested length against the terrain you’ll encounter—steeper sections may call for a slightly shorter pole, while flat ground works well with the listed size.
Finally, remember you can fine‑tune the length within the chart’s range to suit personal comfort and walking style.
Also consider packing a versatile trekking pole that performs well across conditions and supports versatile lures in your tackle or gear setup for multi‑purpose trips.
Match Height to Length
Looking at a height‑based chart is the quickest way to pick the right pole length, and it’s as simple as matching your stature to a preset size. For example, a 5’10” hiker selects 125 cm poles, while someone under 5’1″ chooses 100 cm.
You can also multiply your height in centimeters by 0.68 for a precise fit, ensuring comfort and freedom on any trail.
Verify Metric Conversion
After you’ve matched your height to a preset size, double‑check the metric conversion to make sure the pole length you’ve selected aligns with the chart’s quick‑lookup values.
Multiply your height in centimeters by 0.68, compare the result to the height‑based chart (e.g., 170 cm → 120 cm), and verify with an online calculator or a 90‑degree elbow test.
Adjust by 5‑10 cm if needed.
Adjust for Terrain Variations
Wondering how to tweak your pole length once you’ve checked the height‑based chart?
Shorten them 2–4 inches on steep climbs to keep elbows near thigh level, avoid shoulder strain, and enhance leverage.
Lengthen 2–4 inches downhill for knee relief, upright torso, and better balance.
On sidehills, shorten the uphill side, extend the downhill side; use telescopic poles for quick, fluid adjustments across varied terrain.
Choose Adjustable Telescoping Trekking Poles for Variable Elevation
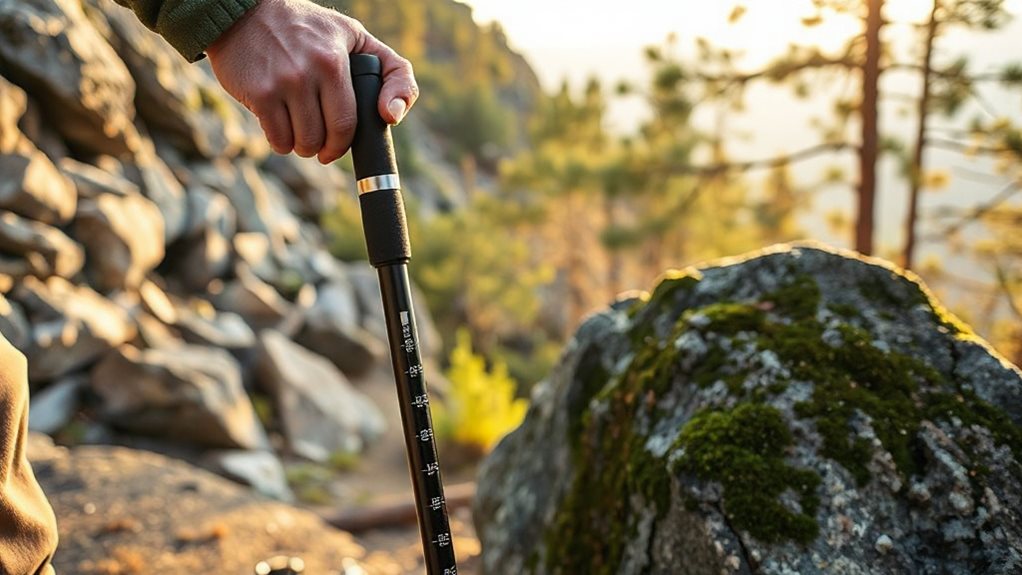
Adjustable telescoping trekking poles are ideal for tackling variable elevation because they let you quickly lengthen or shorten the shaft without stopping your hike, and they’re built with one section sliding inside another and locking into place, giving you a smooth, reliable range of motion.
You’ll shorten 5‑10 cm on steep uphills to keep elbows at a 90‑degree angle, then extend the same amount on downhills for upright posture, using the built‑in centimeter markings and wrist straps for precise, hassle‑free adjustments.
These poles are often made from durable materials like ripstop nylon or aluminum to balance weight and longevity.
Compare FlickLock, Twist‑Lock, and Lever Systems for Trekking Poles
Which locking mechanism you choose can dramatically affect how smoothly your trek progresses, especially when terrain and weather shift rapidly. FlickLock offers a glove‑friendly external clamp that stays firm on rough ground but may need occasional tightening. Twist‑Lock is lightweight and cheap, yet it can slip or freeze in cold, making precise adjustments tricky. Lever systems provide secure, one‑handed operation in any weather, though they’re slightly heavier and require occasional screw maintenance.
Match Pole Length to Your Grip and Hiking Style

Choosing the right pole length starts with how you grip the handle and the type of hiking you plan to do. Align the top of the handle with your waist, keep your forearm parallel to the ground, and aim for a 90‑degree elbow. Adjust for terrain: shorten uphill, lengthen downhill 5‑10 cm, and match your style—trekking, hillwalking, or Nordic walking—by selecting telescopic or fixed poles that maintain that comfortable angle. For longer-lasting use, consider using telescopic poles which offer durable adjustability and are suited to varied terrain.
Run a Safety Checklist Before Every Trek
Ever wonder how a quick, thorough safety checklist can keep a trek from turning into a crisis? Pack a reliable map, compass, and a headlamp; verify your GPS works, then double‑check the first‑aid kit—bandages, antiseptic, blister pads, and meds. Fill water bottles, add high‑energy snacks, and confirm layers, rain gear, and emergency shelter. Grab a multi‑tool, whistle, and spare batteries, then run through each item before you step out.
Final Note
By using the 0.68 formula, testing a 90‑degree arm position, and adjusting for terrain, you’ll nail the perfect pole length. Add a few centimeters for descents, shorten for climbs, and refer to the height‑based chart for quick checks. Choose adjustable, telescoping poles and pick a lock system—FlickLock, twist‑lock, or lever—that feels right. Finally, match the length to your grip and style, and run a safety checklist before every trek.


