Grab a lightweight tarp (10′×12′ works well) and stretch it over a gentle slope, anchoring the high corners to trees or poles and tying a weighted rope to the low edge so water funnels toward a container. Use a roll‑top dry bag or a 5‑gal barrel on cinder blocks for gravity feed, connect with a short hose and a 90° PVC elbow, and add a mesh screen or simple sand filter at the inlet. Sanitize the collected water with a mild bleach solution or by boiling, and keep the system clean by draining and scrubbing regularly; more detailed steps await you.
TLDR
- Choose a lightweight tarp (e.g., 10’×12′ or 16’×20′) and secure its corners with eyelets, rocks, or stakes to create a rain‑catching surface.
- Form a gentle slope (15°–30°) by elevating one side of the tarp on trees or poles and attach a weighted rope to the low edge to guide water toward a collection point.
- Position a clean container (e.g., a dry‑bag or barrel) under the low point, elevating it on blocks if needed for gravity feed, and connect overflow hoses with PVC elbows and filters.
- Use a roll‑top dry bag or similar cover to protect the container during transport and prevent contamination.
- Sanitize the collected water and the system regularly with a mild bleach solution (≈2.3 oz per 1,000 gal), rinse thoroughly, and inspect all components for cracks or blockages.
Pick a Tarp or Survival Blanket for Rainwater Collection
Where do you start when you need a reliable rain‑water catcher on the trail? Choose a lightweight tarp—10′ × 12′ yields 37.8 gallons from half‑inch rain, a 16′ × 20′ blue tarp costs about $40 and folds into a bug‑out bag. Secure corners with eyelets, add rocks or a central stone to prevent sagging, and avoid low spots. Mylar blankets or black drum liners work as low‑budget alternatives, using reflective guy lines for visibility. In dry environments, rain catchment techniques become essential for survival. Use a durable roll-top closure style dry bag to keep collected water and gear protected from contamination and moisture during transport.
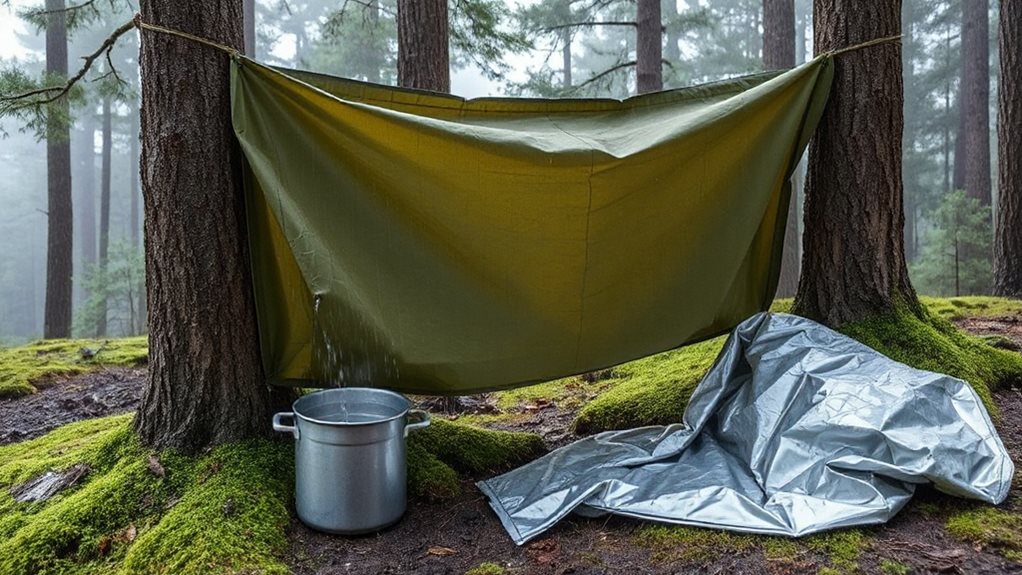
Create a Simple Slope and Rock‑Weighted Rope to Funnel Water
You’ll start by securing the tarp corners to trees or poles at different heights, creating a gentle slope that guides water toward your container. Then you tie a sturdy, rock‑weighted rope to the low edge, threading it through grommets and anchoring smooth to keep the tarp taut and prevent flapping. This simple setup lets rain flow smoothly into the bucket, even in breezy conditions.
Secure Tarp Corners
Securing the tarp’s corners is the key to turning a simple sheet into an efficient rain‑collector, because the tension you apply creates a natural slope that guides water toward a central funnel. Tie each corner to a sturdy anchor—tree, rock, or ground‑spike—using rope loops or adjustable knots. Pull the lines tight, then fine‑tune angles so the tarp forms a gentle ridge, preventing sag and directing flow toward your collection point.
Tie Rock‑Weighted Rope
How do you turn a flat tarp into a functional water‑funnel with just a rope and a few rocks?
Secure the rope along the tarp’s lower edge, then thread heavy, smooth rocks onto it, spacing them evenly. Pull the rope taut, anchoring the high end on a tree, and let the weighted side sag to a 15‑30° slope. Position your container beneath the low point, adjust knots for flow, and watch rain funnel efficiently.
Add Portable Barrels or IBC Totes and Connect Them With Hoses
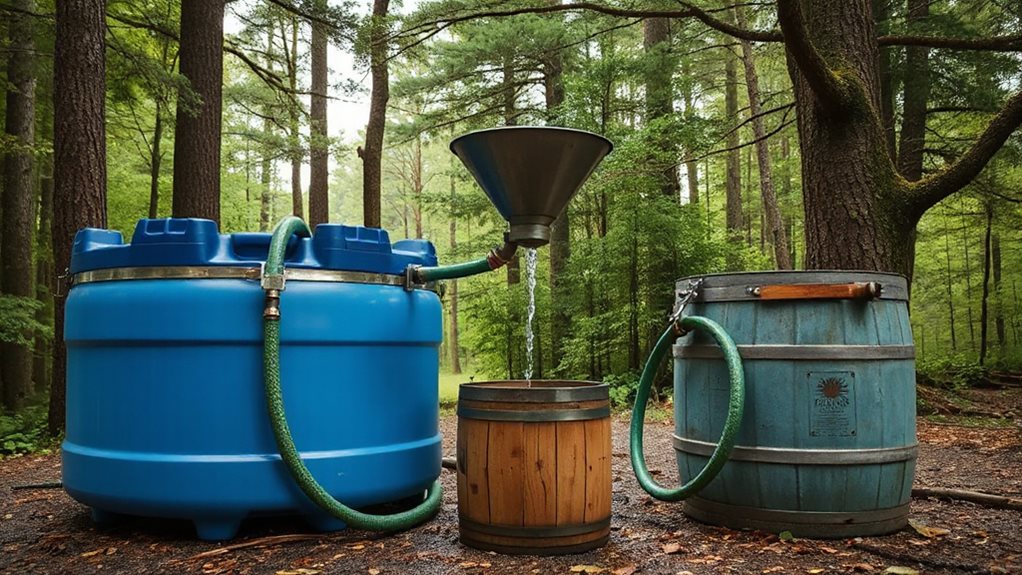
If you have a few spare barrels or an IBC tote, you can dramatically enhance your rain‑water harvest by linking them together with hoses, creating a simple gravity‑fed system that stores enough water for days of off‑grid camping.
Elevate each container on cinder blocks, attach brass 1‑inch adapters, and use 90‑degree PVC elbows to route overflow.
Secure hoses with clips, add filters at inlets, and position the final overflow away from camp.
This setup gives you reliable, portable storage without sacrificing freedom.
Consider adding a basic aeration or circulation feature to help preserve water quality during longer stays and reduce stagnation aeration systems.
Attach an Awning or Gutter Kit to Boost Rainwater Collection
Ever wondered how a simple awning can become a rainwater‑catching powerhouse?
Slip the plastic clips along the rail, use nine or more to form a tunnel, then hang the toggle bucket at the end.
Attach the 20‑foot hose, adjust clips for a smooth hollow, and let water flow into the storage bag.
It fits most awnings, stops splashing, and keeps your campsite dry.
Use Low‑Budget Improvised Rainwater Collectors When Gear Is Scarce

When gear is scarce, you can still gather enough rainwater for a night in the woods by repurposing everyday items into simple, low‑budget collectors. Hang a tarp or plastic sheet between trees, leaving one side taut and the other slack so water drips into a corner bagged with a rock. Use a shallow hole lined with a tarp for ground‑level catch, placing a bucket at the lowest point. Position a wide‑mouth barrel beneath a sloped roof or rock overhang to collect natural drips, and seal a plastic bag around a branch for solar condensation when sunshine hits. These improvised setups let you stay independent and hydrated.
Install Mesh Screens and Survival‑Spring Filters for Clean Rainwater
How do you keep the rain you collect as clean as possible while camping? Snap a 0.955 mm mesh screen onto your tank inlet, then attach a 180‑micron filter bag for fine particles. Use a U‑shaped Maelstrom screen to divert leaves, and a high‑flow side mesh to capture water from any direction. The shark‑cage design self‑flushes, keeping mosquitoes out and flow steady.
Clean and Maintain Your Rainwater Collector for Safe Drinking
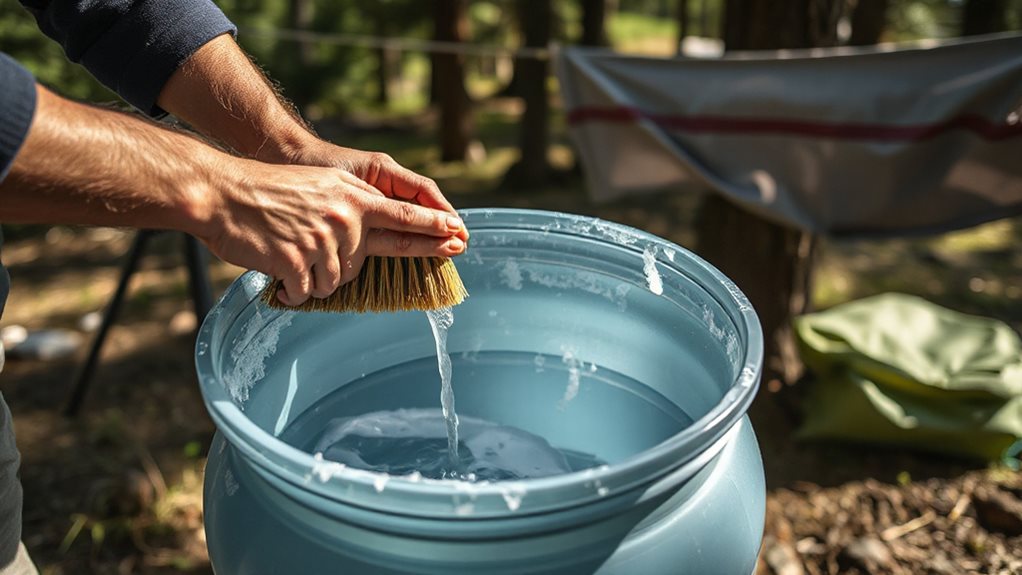
You should sanitize your collector regularly, using a mild bleach solution or boiling water to kill microbes, and then rinse it thoroughly before use.
Inspect every component—roof, gutters, tanks, pipes—for cracks, leaks, or blockages at least once a month, because even small damage can contaminate your supply.
Sanitize Collector Regularly
Ever wondered why regular sanitizing of your rainwater collector is essential for safe drinking?
Drain the tank completely, release pressure, then scrub interior walls with soapy water and a coarse brush; use an extendable rod for hard‑to‑reach spots.
Apply a mild bleach solution (2.3 oz per 1,000 gal), wait 24‑48 hours, rinse three times, and clean filters each season.
Inspect for Damage Frequently
Regularly inspecting your rainwater collector for damage is essential to keep the system safe and efficient, and it’s easier than you might think.
Check the roof for dust, leaves, and cracked tiles, then clean gutters and downspouts,, screens, and mesh for debris.
Verify first‑flush valves, drains, and tank lids are secure, and tighten any loose screws or brackets promptly.
Final Note
By setting up a tarp, sloped rope, and simple gutters, you can harvest rainwater efficiently while camping. Connect the runoff to a barrel or IBC tote, filter it through mesh and a spring‑style filter, and keep the system clean for safe drinking. This low‑cost, low‑tech setup works even with limited gear, giving you a reliable water source that’s easy to maintain and adaptable to any campsite.


