Wipe your pocket knife after each use and clean the blade with soapy water when needed, using a toothbrush for tight spots. Disassemble carefully using the right Torx bits, keeping screws and washers organized. Clean the lock and pivot with isopropyl alcohol and compressed air, then apply a drop of lubricant to the pivot and detent. Reassemble smoothly, test the action, and you’ll keep your knife running like new—there’s more to get right with a few extra tips.
TLDR
- Wipe the blade after each use and clean with soapy water and a toothbrush for stubborn grime.
- Disassemble carefully using proper Torx tools, keeping track of screws, washers, and spacers.
- Clean pivot and lock areas with isopropyl alcohol, then blow out debris with compressed air.
- Inspect for damage with a loupe and remove rust gently using a lemon juice mixture if needed.
- Apply one drop of lubricant to pivot and detent, then reassemble and test blade smoothness and lock.
What You Need to Clean a Pocket Knife
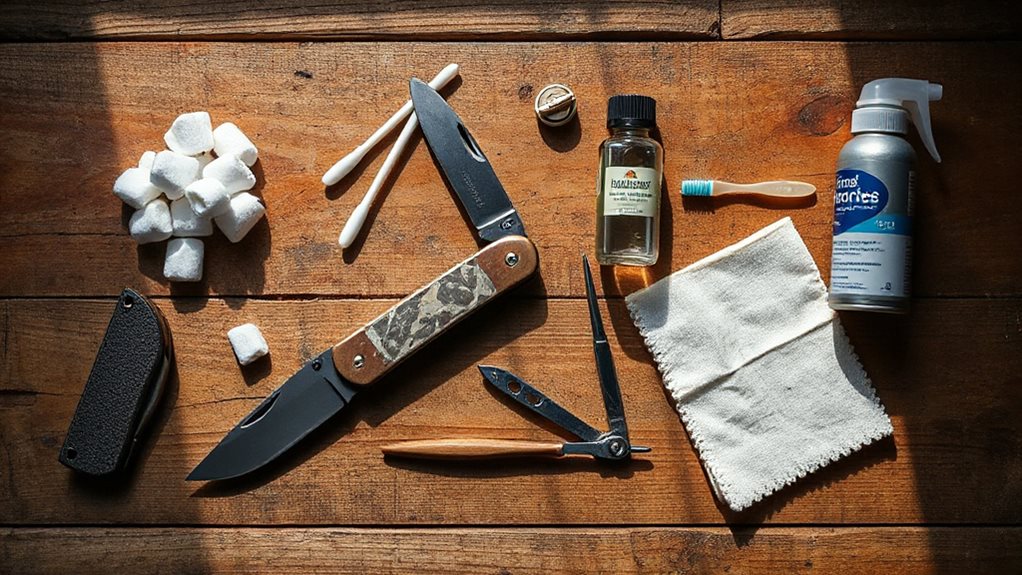
Gather your supplies before diving in, because having the right tools on hand makes cleaning your pocket knife efficient and safe.
Use a KnifeJoy silicone mat for stability and magnetized part retention. Grab your Leatherman Wave Plus, Knipex pliers, and T10/T6 Torx drivers. Don’t forget gloves, cotton swabs, microfiber cloths, isopropyl alcohol, and Nano-Oil for lubrication—everything you need for a thorough, freedom-minded cleanup. For detailed inspection during cleaning, a watchmaker’s loupe is highly recommended to spot hidden grime or burrs on pivot areas. Be sure to perform regular maintenance to prevent corrosion and extend the blade’s durability.
How to Disassemble a Pocket Knife Safely
Grab your screwdriver and lay the knife flat on a soft surface like a mouse pad to protect the blade and parts.
Make sure you’ve got the right tools and a clear workspace, then start by removing the pocket clip and loosening screws carefully to avoid stripping them.
Keep screws organized and note how everything comes apart, since reassembly goes much smoother when you remember where each piece goes.
If you suspect any internal damage after a mishap, have the knife inspected by a professional to ensure internal damage is detected and addressed.
Proper Tools And Setup
While tackling a pocket knife disassembly might seem straightforward, having the right tools and setup makes all the difference in doing it safely and effectively.
Use a precision bit driver, like the iFixit Aluminum model, paired with Wiha or Torx bits for a secure fit. Set up on a silicone mat with a magnetic holder, outline your knife on paper, and keep everything dry—this keeps parts organized and prevents damage during cleaning.
Careful Part Handling
Start by setting up your workspace with a clean, well-lit surface and a tray to catch small parts—you’ll want everything visible and contained.
Remove screws carefully using the right Torx bit, and keep them organized.
Note washer and bearing positions before separating parts.
Handle the blade like it’s sharp—because it is.
Keep fingers clear, go slow, and never force anything.
Clean the Blade: Step-by-Step Methods
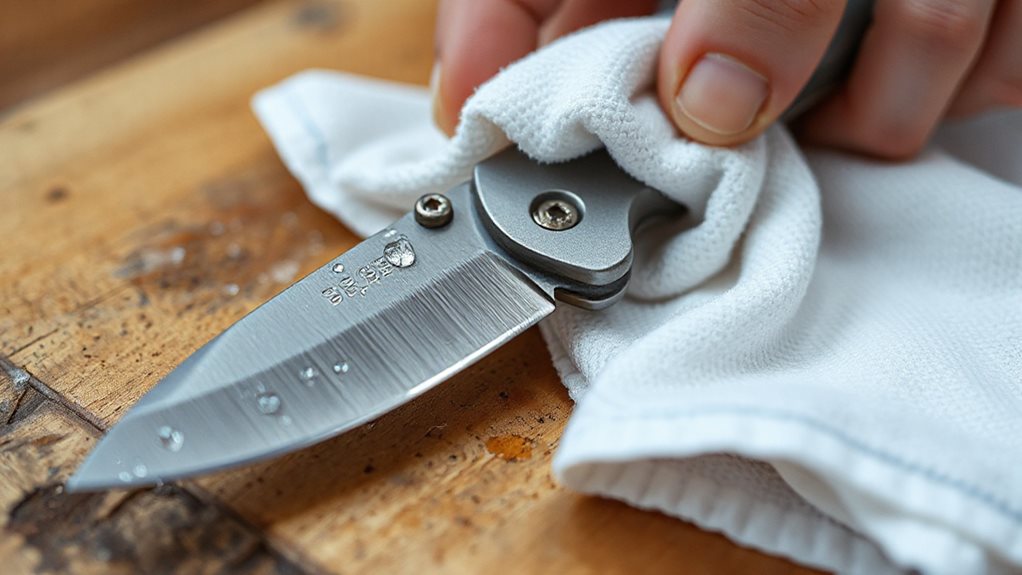
Keeping your pocket knife in top condition begins with properly cleaning the blade, an essential step that prevents corrosion, guarantees smooth operation, and extends the life of your tool.
Wipe it dry after each use, scrub gently with soapy water when needed, and use tools like a toothbrush or cotton swab for tight spots.
Remove rust carefully, dry thoroughly, then apply a light lubricant to protect and keep it running smoothly.
For stubborn buildup, gently clean with a mixture of lemon juice and water and consider using a toothbrush to remove residue from the teeth and hinge area, since cleaning the zipper teeth techniques often translate well to maintaining other small metal mechanisms.
Clean the Lock and Internal Mechanism
When dirt and lint build up in your pocket knife’s lock and internal mechanism, it can hinder smooth operation and even compromise safety, so giving these areas some focused attention makes a big difference.
Use tweezers or a toothpick to remove debris from the pivot and locking notch, and gently clean the lock bar recess with a precision tool.
Swab with alcohol, blow out residue, then apply a drop of lubricant to keep everything running smoothly.
Regular maintenance also helps prevent corrosion on metal parts and extends the tool’s lifespan.
Quick Cleaning Without Taking It Apart
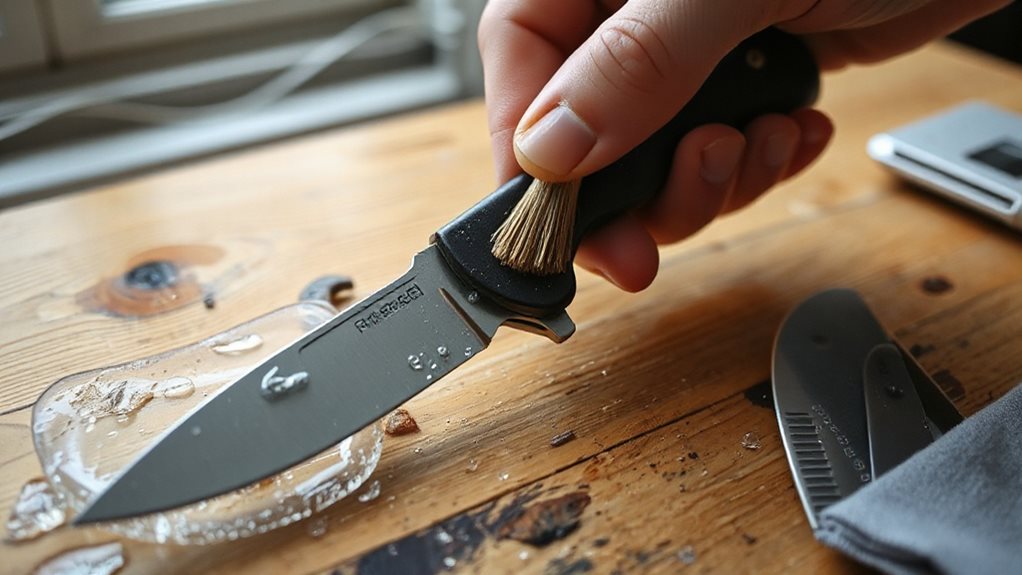
You can tackle everyday grime on your pocket knife quickly and safely without disassembling it—perfect for routine maintenance between deeper cleanings.
Open the blade fully, then use a toothbrush with soapy water to scrub the surface. Clean crevices with toothpicks or cotton swabs, blow out debris with compressed air, and dry thoroughly with a lint-free cloth to prevent rust. For added preparedness, carry a compact multi-tool to handle unexpected repairs or tighten screws while outdoors.
Lubricate the Pivot and Detent
Grab your preferred lubricant and add just a drop or two to the pivot points—remember, less is more.
If your knife has a detent, hit that spot with a slightly heavier oil like KPL Heavy to keep it snapping smoothly into place.
Open and close the blade several times to work the oil in, then wipe away any excess so it doesn’t attract lint or grime.
Lubricate Pivot Points
Keep your pocket knife running smoothly by giving the pivot and detent some well-deserved attention—lubrication here isn’t just helpful, it’s essential for reliable, smooth operation.
Apply a drop of KPL or nano-oil, cycle the blade, and wipe excess.
Use dry lube for less maintenance, especially with Teflon washers.
Target bearings and lock interfaces, and clean with compressed air between sessions.
Apply Detent Oil
A smooth, responsive pocket knife starts with a well-maintained detent—clean it first to remove grit, old lubricant, and debris that can hinder performance.
Apply one drop of lightweight oil, like NanoOil 10W or Benchmade Blue Lube, directly to the detent track.
Work it in by opening and closing the blade, then wipe away excess to prevent dust buildup and make certain smooth, reliable action.
Test Blade Smoothness
Now that you’ve oiled the detent and made certain the mechanism starts to respond smoothly, it’s time to check how well the blade opens and closes after lubrication.
Test the edge’s smoothness using light reflection—any glints mean dullness or damage.
Run a fingernail lightly across the edge; sharpness grips slightly.
Confirm uniform feedback from heel to tip, ensuring consistent performance and safety during use.
Reassemble and Test Your Knife
Line up the blade with the pivot area, making sure the tang slides smoothly into its slot or notch.
Reattach washers and spacers, then align the handle scales carefully.
Insert the pivot screw first, snug it gently, and test the blade’s movement.
Open and close it slowly, checking for smooth action and proper lock engagement.
Adjust tension if needed, then tighten all screws securely.
Final Note
You’ve cleaned and lubricated your pocket knife, now it’s ready for everyday use. Regular maintenance keeps it functioning smoothly and extends its life. Always store it in a dry place to prevent corrosion. A quick wipe down after use goes a long way, especially if exposed to moisture or dirt. With just a few minutes of care now and then, your knife stays reliable, safe, and sharp—ready whenever you need it.


