Pack a compact, waterproof first‑aid kit that includes antiseptic wipes, a 35 cc irrigation syringe, non‑adherent dressings, gauze rolls, moleskin, and closure strips for wounds and blisters; add acetaminophen or ibuprofen, loperamide, an antihistamine, an EpiPen, and any personal prescriptions with a blood‑sugar kit if needed. Bring tweezers, trauma shears, a multi‑tool, 3M Micropore tape, and a lightweight splint, plus nitrile gloves, a CPR mask, a space blanket, water‑purification tablets, electrolyte packets, and a waterproof pouch with labeled resealable bags and a contact card. Follow the organization tips for quick access, and you’ll see how to expand each section.
TLDR
- Include comprehensive first‑aid supplies: antiseptic wipes, gauze, non‑adherent dressings, adhesive tape, antibiotic ointment, and a space blanket.
- Pack essential medications and health tools: pain relievers, antihistamines, EpiPen, blood‑sugar kit, and waterproof documentation.
- Bring treatment tools and safety items: irrigation syringe, scissors, tweezers, trauma shears, splint, and a puncture‑resistant sharps container.
- Ensure protection, hydration, and comfort: nitrile gloves, CPR mask, water purification tablets, electrolyte packets, and a lightweight emergency shelter.
- Organize for rapid access: bright waterproof nylon pouch, resealable labeled bags, external pocket placement, and a clear emergency contact card.
Essential First‑Aid Supplies for Trail Emergencies
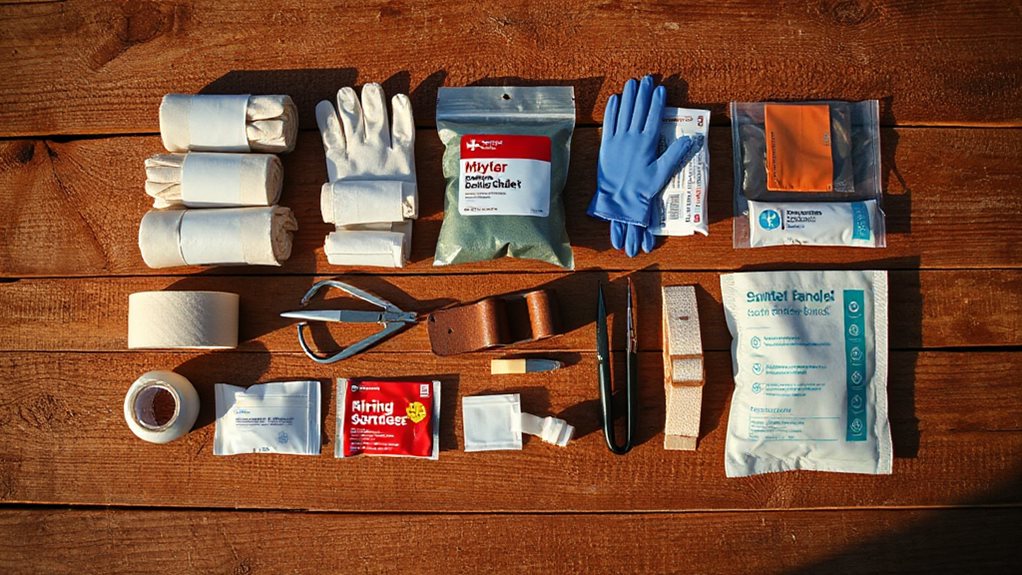
What should you pack to treat common trail injuries quickly and safely? Bring antiseptic wipes, a 35 cc irrigation syringe, antibiotic ointment, and disinfectant cream to clean and protect wounds. Hiking poles can also help reduce joint stress and improve stability on uneven terrain, making it easier to reach and treat injuries when needed by providing balance and support.
Pack non‑adherent dressings, gauze rolls, adhesive tape, and moleskin for blisters.
Include sterile bandages, a tourniquet, and a SAM splint for bleeding and stabilization.
Add ibuprofen, antihistamine, oral rehydration salts, gloves, tweezers, scissors, and a multi‑tool.
Organize the kit in resealable bags and label medications for quick access.
Choosing the Right Wound‑Care Kit for Hiking
Where should you start when assembling a wound‑care kit for the trail? Pack BZK wipes or povidone‑iodine pads for cleaning, a small irrigation syringe for flushing, and non‑latex gloves for hygiene.
Include 4‑inch closure strips, 4×4 sterile dressings, gauze rolls, and medical tape for sealing.
Add antibiotic ointment, petroleum jelly, and a hydrogel pad for protection, plus tweezers, scissors, and a safety pin for quick fixes.
Packing Lightweight Dressings for Blisters & Cuts
You’ll want a few essential dressings—like pre‑cut blister pads and hydrogel sheets—that stay put, protect, and speed healing without weighing you down.
Pair them with secure tape choices, such as moleskin or medical tape, to layer protection and keep the dressings from shifting on rough terrain.
Finally, add compact antiseptic options—alcohol prep pads or wipes—so you can clean the area before applying any dressing, ensuring a clean, infection‑free recovery.
Consider also carrying a lightweight, multi‑use adhesive option like medical tape that’s durable and easy to adjust on the trail.
Essential Dressings
Ever wonder how a few tiny pieces of material can keep a blister from turning into a painful roadblock or a cut from bleeding out on the trail?
Pack 2×2‑inch non‑adherent dressings or Second Skin for blisters, 4×4‑inch sterile gauze pads (5‑10 count) for pressure, a roll of compressed gauze, and 4‑inch closure strips for larger wounds.
Add antiseptic wipes, lidocaine pads, and triple‑antibiotic ointment to keep everything clean and ready.
Secure Tape Choices
Why choose the right tape matters more than you might think when you’re treating blisters or cuts on the trail. Pack lightweight zinc‑oxide or Leukotape for sturdy, breathable dressings, and a small roll of waterproof insulation tape for wet conditions. Add a few strips of 3M Transpore for flexible, breathable coverage, plus a compact duct‑tape piece for quick repairs or makeshift markers. Choose bright colors for visibility, and store all tapes in a resealable pouch.
Compact Antiseptic Options
A compact antiseptic kit should combine lightweight dressings that clean, protect, and promote healing without weighing you down. Pack six to eight BZK wipes in individual packets for quick, dirt‑free cuts, and a small tube of triple‑antibiotic ointment to curb infection. Add a hydrogel blister pad, a single‑use liquid bandage ampule, and three butterfly strips; each item weighs under an ounce, keeping your pack light and your freedom unrestricted.
Selecting Medications for Fever, Diarrhea, and Allergies
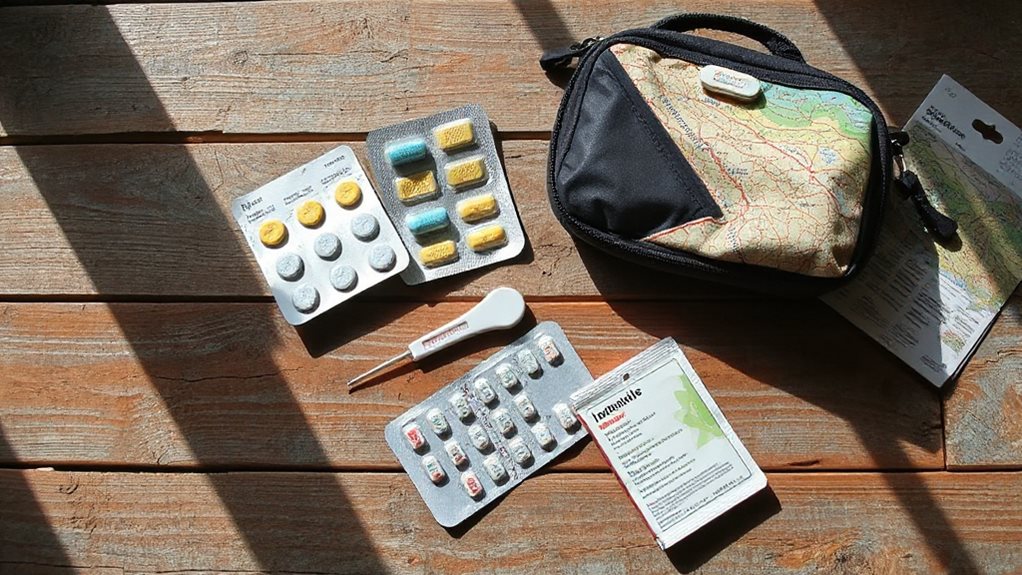
How do you decide which meds to stash for fever, diarrhea, and allergies while hiking? Pack lightweight tablets—acetaminophen or ibuprofen for fever, loperamide for diarrhea, and a non‑sedating antihistamine like Claritin for allergies—plus an EpiPen for severe reactions. Use waterproof, sealable pouches, double‑check expirations, and pair antidiarrheals with oral rehydration salts to stay hydrated and alert. Consider also bringing a compact First Aid Kit for general emergencies and basic wound care, as a proper First Aid Kit is essential for safety.
Must‑Have Tools for Your Hiking First‑Aid Kit
Ever wonder which tools will keep you prepared when a hike turns into a medical emergency? Pack a multi‑tool knife with scissors, trauma shears for cutting clothing or splints, and a small utility tool that includes tweezers. Add a 35 cc irrigation syringe, sterile saline, and antiseptic wipes for cleaning. Include adhesive tape, 3M Micropore, and a benzoin tincture to secure dressings, plus a lightweight foam‑covered splint and safety pins for immobilizing injuries. Consider including lightweight instant meals for emergencies to provide calories and comfort when aid may be delayed.
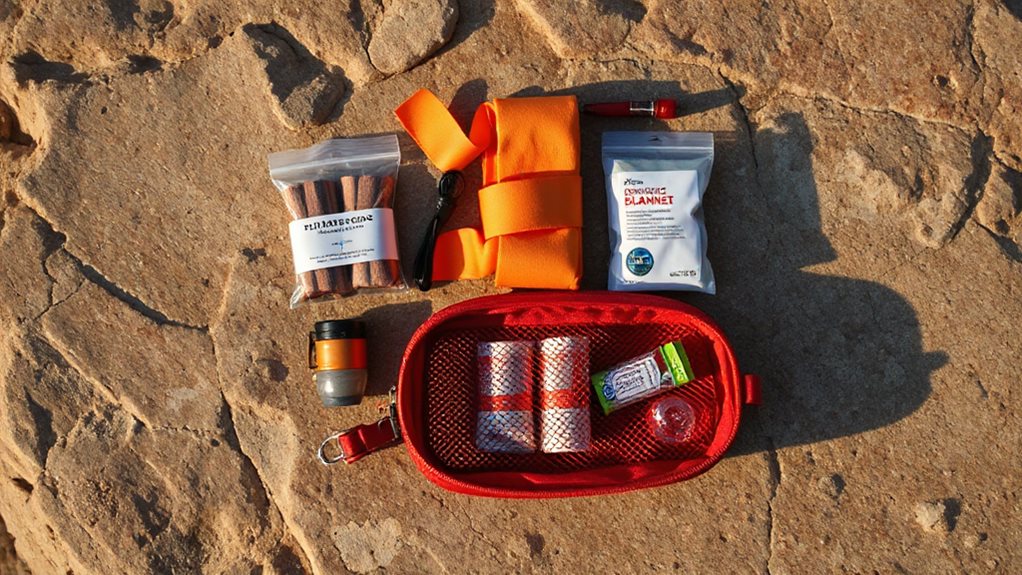
Protecting Yourself With Gloves, CPR Masks, and Space Blankets
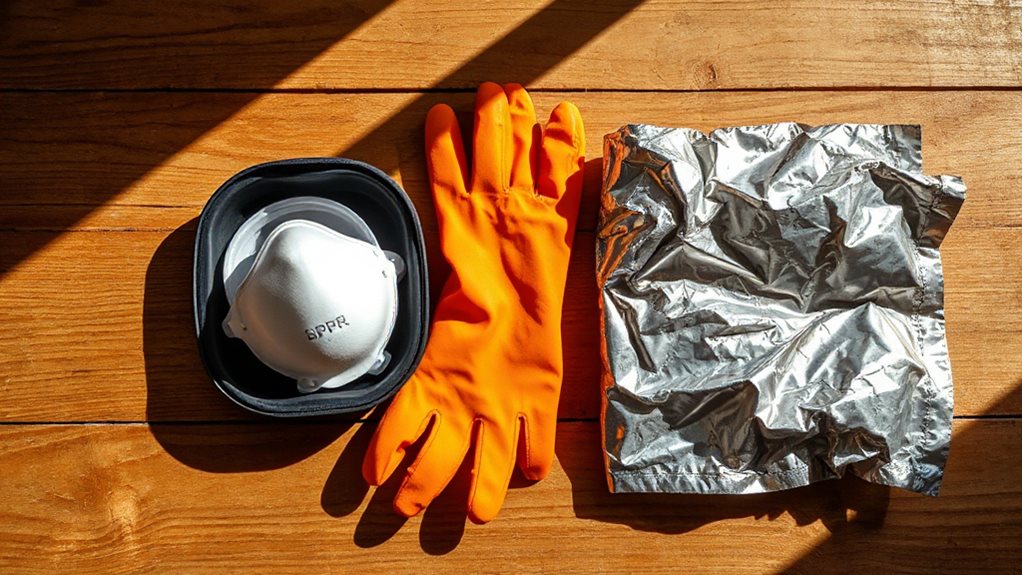
You’ll want nitrile gloves as your go‑to because they balance durability and dexterity while keeping you safe from blood‑borne pathogens, and you should size them correctly and consider a dual‑layer system for extra protection.
When you pack a CPR mask, check that the one‑way valve is intact, store it in a clean pouch, and replace it if it gets contaminated to maintain hygiene during rescue breaths.
A space blanket should be folded neatly, kept in a waterproof container, and you can use it as a heat reflector, ground insulator, or signal—just pull it out quickly when temperatures drop or you need to stay visible.
Also consider including a compact battery-powered device to power essential gear and extend runtime in cold conditions.
Glove Selection Basics
Choosing the right gloves for a hiking emergency kit starts with understanding the balance between protection, dexterity, and weather resistance. Layer liners for flexibility, add insulated pairs for -5 °C to 5 °C, and keep a waterproof lightweight option for rain or snow. Favor textured palms and close‑fitting designs for grip, ensure a snug wrist closure, and pack a backup pair to handle loss or soaking.
CPR Mask Hygiene Tips
After picking the right gloves, the next step is keeping the CPR mask clean so it protects both you and the patient.
Disassemble the mask, wash it in warm soapy water (60‑70 °C) for 20 minutes with a soft brush, rinse at 30‑40 °C, then submerge in an EPA‑approved disinfectant like ¼‑cup bleach per gallon.
Air‑dry fully in a ventilated spot, wear fresh gloves throughout, and replace the mask after 20 cleanings or if damaged.
Space Blanket Usage Guidelines
Where can a space blanket make the biggest difference in an emergency, and how does it work alongside gloves and a CPR mask?
You wrap the shiny side inward, covering head and torso, tuck edges, and add a thin insulating layer to trap heat, while gloves protect hands and the mask shields airway.
Flip it outward for sun shade, use it as a signal mirror, or lay it as a ground tarp to block cold from the earth.
Hydration & Nutrition Aids to Include in Your First‑Aid Kit
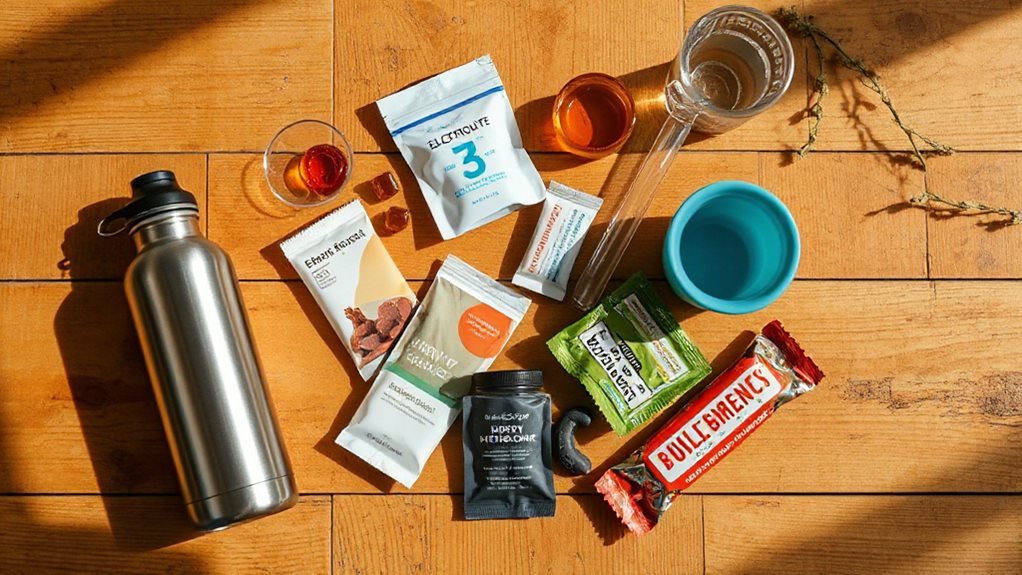
Ever wondered how to keep your energy and fluids balanced when a hike turns into an emergency? Pack electrolyte packets or Gatorade‑style drinks for rapid rehydration, plus water purification tablets and at least one gallon per person daily.
Include glucose tablets, high‑energy granola or protein bars, jerky, and canned legumes for sustained calories.
Add powdered milk, dried fruit, and a small irrigation syringe for wound flushing without contaminating water.
Documentation & Extras to Add to Your First‑Aid Kit
How can you ensure that critical medical information stays organized and accessible when every second counts? Pack a waterproof first‑aid booklet, a CPR card, and a small notepad with a waterproof pencil for logging symptoms and treatments. Include labeled prescription meds, an EpiPen, inhaler, and a blood‑sugar kit. Add a contact card with emergency numbers, a medical‑waste bag, and clearly labeled waterproof containers for all documentation.
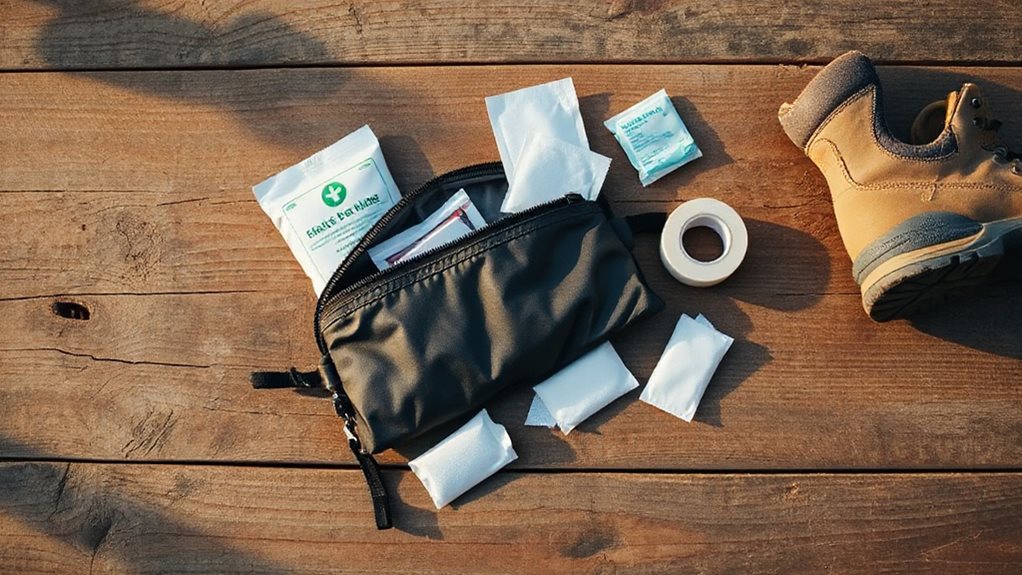
Organizing and Securing Your Hiking First‑Aid Kit for Quick Access
When you’re on the trail, every second counts, so your first‑aid kit must be organized for instant access. Pack the kit in a bright, waterproof nylon pouch near the top of your pack or in an external pocket, label each resealable bag by category, and keep medications clearly marked. Use a puncture‑resistant container for sharps, and make sure the group knows the exact location before you set out.
Final Note
By packing a compact, well‑organized first‑aid kit, you’ll be ready for common trail mishaps without weighing yourself down. Include lightweight dressings, essential medications, protective gloves, and a space blanket, then store everything in a waterproof pouch that’s easy to reach. Keep the kit secured to your pack or belt, and regularly check supplies for expiration dates. With these basics in place, you can hike confidently, knowing you’ve covered the most likely emergencies.


