You’ll want a square knot for quick, sterile first‑aid bandages, a clove hitch to fasten rope to posts or gear, a bowline for a reliable, non‑slipping loop that won’t jam under load, a taut‑line hitch to adjust tension on guy‑lines, a figure‑eight as a strong stopper or loop for anchors, and a sheet bend—double if the ropes differ greatly—to join unequal‑diameter lines safely; mastering these will cover most camping and survival needs, and the next sections show you exactly how to tie each one.
TLDR
- Bowline creates a strong, non‑slipping loop for securing heavy loads and anchors.
- Square (reef) knot reliably joins two ropes of similar thickness, ideal for first‑aid bandages and quick ties.
- Clove hitch fastens rope to posts or poles on wood, metal, or uneven surfaces, perfect for tarps and gear.
- Taut‑line hitch provides adjustable tension on guy‑lines, allowing easy re‑tensioning against wind.
- Sheet bend (or double sheet bend for vastly different diameters) safely connects unequal‑thickness ropes.
How to Choose the Right Survival Knot for Your Gear

How do you pick the right survival knot for the gear you’re carrying? Start by matching load and environment: bowline for heavy, non‑slipping loads; clove hitch for quick, temporary posts; prusik for friction‑based ascents; sheet bend for joining different‑thickness ropes; taut‑line hitch for adjustable tension against wind. Consider ease of adjustment and gear compatibility, then test the knot under real conditions before relying on it. The square knot is ideal for securely joining two ropes of similar thickness. Many campers combine knot choice with site selection, especially when camping near lake shore areas that require secure guy lines and anchors.
Tie a Square Knot for First‑Aid Bandages (Step‑by‑Step)
Ever need to secure a bandage quickly and reliably? Grab the right‑hand end, cross it over the left, and tie an overhand knot. Then cross the left over the right, tie a second overhand knot, and pull both ends tight. This square (reef) knot locks the triangular bandage in place without cutting circulation, stays sterile, and releases easily when you pull the left end outward.
Tie a Clove Hitch to Secure Rope to Posts Quickly
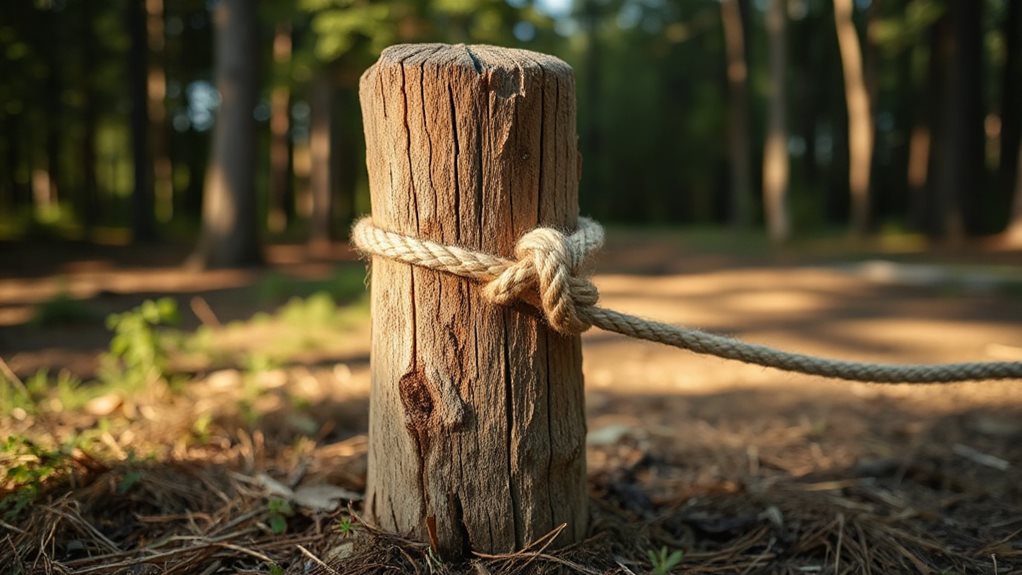
You can secure a rope to a post in seconds with a clove hitch, giving you a quick attachment method that works on wood, metal, or even uneven surfaces. The knot’s two turns wrap around the post, and pulling the standing part tight locks it in place without needing extra tools. Just keep a little tension on the rope and you’ll have a reliable hold for tarps, lanterns, or gear while you move on to the next task. Small, lightweight tackle setups like a 6-foot rod and 6-pound line are useful to keep on hand for fishing while camping.
Quick Attachment Method
Ever needed to secure a rope to a post in seconds? You’ll wrap the rope around the anchor, then loop the working end back over the post, forming two neat loops.
Pull the standing part and working end together, squeeze the loops, and the clove hitch locks instantly. This quick attachment lets you adjust on the fly, stays reliable on slippery cordage, and frees you to move on.
Secure on Varied Surfaces
How do you keep a rope firmly attached when the anchor is a rough bark tree, a slick metal post, or a weather‑worn wooden stake?
You wrap the working end around the post, then again crossing the standing part, feed it under the turn, and pull both ends to tighten.
Dress the knot, add a half‑hitch if needed, and maintain tension for reliable, quick security across any surface.
Tie a Bowline Knot for a Fixed, Non‑Slipping Loop
A bowline creates a fixed, non‑slipping loop that stays secure under heavy load and still unties easily when the pressure’s released, making it a go‑to knot for camping and survival situations.
Form a rabbit hole near the rope’s end, thread the working end up through it, wrap around the standing line, then feed it back down.
Dress the knot by pulling each strand; you’ll have a reliable, quick‑release loop for shelters, rescue, or gear.
Keep in mind that, like radio range claims, real-world performance depends on conditions, so expect variable results when relying on equipment and terrain effects.
Tie a Taut‑Line Hitch for Adjustable Tension on Guy‑Lines
After conquering the bowline’s reliable fixed loop, you’ll find the taut‑line hitch perfect for situations where you need to fine‑tune tension on a guy‑line or tarp cord.
Wrap the rope around the anchor, run the free end parallel, then coil it twice around the standing line, add a third turn, thread, end back, dress the knot, and slide it to tighten or loosen as wind, rain, or gear demand.
Tie a Figure‑8 Knot as a Strong Stopper or Loop
You’ll find the figure‑8 stopper gives you a bulky, reliable knot that won’t slip through a device, while still being easier to untie than an overhand under load.
When you need a loop, simply tie a figure‑8 a a bight, then retrace the path with the working end to double the security for gear or anchors.
This knot’s clear shape lets you inspect it quickly, making it ideal for camping, climbing, or any survival scenario where strength and reliability matter.
For added comfort on hard ground during extended use, consider using a medium-thick mat to reduce impact while maintaining stability.
Figure‑8 Stopper Benefits
Ever wondered why the figure‑8 stopper is a go‑to knot for campers and outdoor enthusiasts? You get a strong, high‑tensile knot that resists slippage, holds a bulky end to keep rope from sliding out of sight, and stays secure under load. It’s easy to tie, inspect, and untie, works for kayakers, climbers, and tie‑downs, and outperforms simple overhands and clove hitches.
Figure‑8 Loop Creation
Create a figure‑8 loop by starting with a long bight of rope, forming an overhand loop, and adding an extra wrap before tucking the working end through the newly formed loop; then snug the knot, uncrossing the strands to make untangling easier. Dress it properly, tighten to your desired size, and you’ll have a reliable, non‑slip loop for anchors, harnesses, or gear rigging, whether on synthetic or natural rope.
Tie a Sheet Bend to Join Unequal‑Diameter Ropes Safely
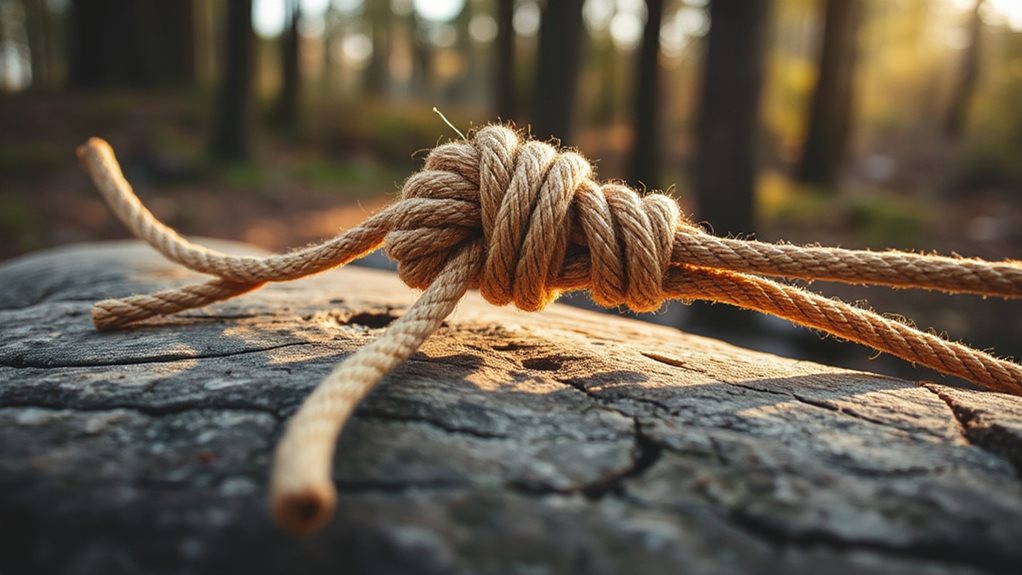
How do you securely connect two ropes that differ in thickness without fuss? Form a bight in the thicker line, slip the thinner rope through from underneath, then wrap it around the bight, its tail, and the standing part. Tuck the thinner tail under itself, pull all ends, and keep both tails on the same side. For vastly different diameters, add a second wrap with the smaller rope, creating a double sheet bend that stays firm yet unties easily. Test gear at home first to catch issues early and ensure the knot holds when stressed pitch tent setup.
Final Note
Mastering these knots gives you confidence in any outdoor scenario—whether you’re bandaging a wound, securing a tarp, or rigging a shelter. Choose the right knot for the task, practice regularly, and keep your rope in good condition. With a square knot for bandages, a clove hitch for quick posts, a bowline for a reliable loop, a taut‑line hitch for adjustable tension, a figure‑8 for a strong stopper, and a sheet bend for joining different ropes, you’ll handle gear safely and efficiently.


