You’ll need about two to four weeks of focused planning to organize a proper camping trip. First, pick a trip type—tent, RV, backpacking, canoe, or glamping—because it drives gear, skill level, and transport needs. Next, check reservation and permit deadlines, which can range from 90 days for Everglades wilderness sites to 30 days for Great Smoky backcountry permits. Map your route, identify backcountry requirements, and secure any needed permits as soon as the booking window opens. Build a gear inventory, run a two‑week test‑run, and coordinate group schedules with a shared hub. Pack safety essentials and emergency protocols, then finalize your checklist and pack the day before departure. A quick weather check and final gear re‑inspection will keep you on track, and if you keep going, you’ll uncover more details.
TLDR
- Choose the trip type and access needs first; this determines gear, skill level, transport, and preparation depth.
- Check reservation and permit deadlines early, then book as soon as windows open to secure preferred sites.
- Create a detailed gear, meals, and group‑coordination list, testing equipment and menus at least two weeks before departure.
- Prepare safety and emergency equipment, including first‑aid kit, navigation tools, and a reliable communication device.
- Conduct a final pre‑departure checklist and weather review the day before, confirming all gear, permits, and itinerary details.
Start Your Camping Trip Planning by Choosing a Trip Type
What kind of outdoor experience do you want, and why does that matter before you even start packing? Choose a trip type first—tent, RV, backpacking, canoe, or glamping—because each dictates gear, skill level, transport, and prep depth. Beginner families lean toward tents or cabins, while thrill seekers prefer backpacking or bikepacking. Align the style with your goal, match skill, and estimate research time accordingly. Front-country camping offers easy access to amenities, which can simplify planning. Plan permits, timing, and destination early to match your trip type with route, weather, and group needs for a smoother experience and better safety trip purpose.
Check Camping Trip Planning Deadlines for Reservations and Permits
When you start planning a camping trip, the first thing to check is the reservation and permit calendar, because missing a deadline can mean losing the site you want.
Note that Everglades wilderness sites open 90 days ahead, Great Smoky backcountry permits appear up to 30 days before, and state parks may allow bookings up to 11 months.
Timed‑entry permits for Arches and lottery slots for Grand Canyon or Enchantments require early attention, so mark each deadline on your calendar.
Also consider checking nearby national parks like Great Smoky Mountains for alternative hiking and camping options if your first choice is full.
How to Reserve Your Campsite or Permit When Booking Opens
Set your desired arrival and departure dates as soon as the booking window opens, then sync your clock to the official UTC time to avoid missing the first seconds.
Enable automatic alerts on Recreation.gov or third‑party tools so you’re notified the moment a campsite becomes available or a cancellation is posted.
Finally, double‑check the reservation details—site number, dates, and payment info—before you hit confirm, because you only have a few minutes to lock it in.
Also, confirm the campsite has family-friendly amenities like bathrooms and playgrounds to ensure a comfortable stay for kids.
Set Booking Dates Early
Because most national‑park campsites open reservations exactly six months ahead, you’ll want to mark your calendar as soon as the release date is announced and have your account, payment details, and preferred dates ready to go.
Check each park’s release time—often 7 AM PT, 8 AM MT, or 10 AM ET—set your device clock, and keep a fast internet connection.
Prioritize mid‑week or shoulder‑season dates to dodge the rush, and always have backup campsites queued for instant swapping.
Set Up Alerts Automatically
Often you’ll miss a coveted campsite simply because you weren’t notified the instant a spot opens, so automating alerts is essential.
Choose a service—Campsite Assist, Campnab, or Campflare—set your park, dates, nights, and phone or email, then pick a scan frequency (3‑, 13‑, or 33‑minute intervals).
Enable push alerts on Recreation.gov or ReserveAmerica, keep a loud ringer, and be ready to click the link the moment you get a text.
This fast, hands‑free monitoring maximizes your chance of snagging that perfect spot.
Confirm Reservation Details
When the reservation window opens, you’ll want to have every detail ready so you can act the moment the site becomes available.
Check the park’s “Seasons and Fees” tab for exact dates, verify rolling versus fixed releases, and know whether you need a permit, campsite, or both.
Pre‑enter arrival and departure, rank preferred loops, and confirm vehicle limits, then finalize and save the confirmation number instantly.
Map Your Camping Trip Route and Identify Backcountry Needs
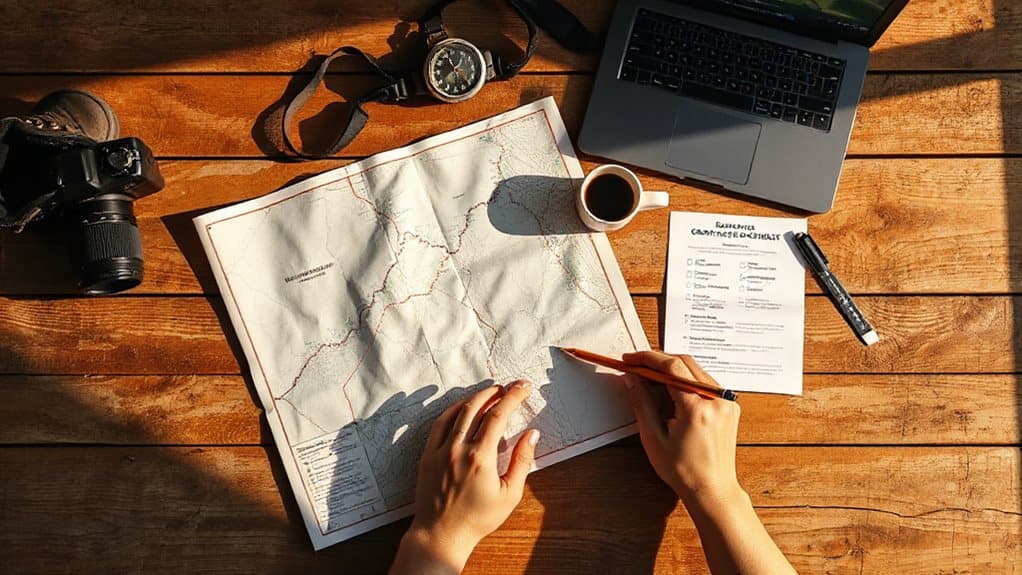
Pick a trailhead and convenient access points, then check the terrain’s difficulty and distance to gauge how much time and effort you’ll need.
Look up the required permits and any local regulations, noting deadlines and restrictions that could affect your route.
Also verify state-specific hunting and wildlife rules, since many areas are managed by wildlife agencies that set seasons and access restrictions which could impact backcountry use.
Select Trailhead and Access Points
Choosing the right trailhead sets the foundation for a smooth backcountry voyage, because it determines your entry point, mileage, loop or out‑and‑back shape, and parking logistics before you even think about gear or permits.
Use mapping tools to verify road access, parking limits, and shuttle needs; confirm legal entry points and campsite zones; check for seasonal closures or private land; and identify backup trailheads in case crowds or road conditions change.
This guarantees flexibility, safety, and efficient water‑carrying plans.
Assess Terrain Difficulty and Distance
A solid plan starts with mapping the exact route and measuring both distance and elevation gain, because those numbers drive every other decision you’ll make in the backcountry.
Check rating scales—Wildland Trekking, SAC, or Shenandoah—to gauge daily mileage, elevation thresholds, and grade percentages.
Note terrain ruggedness, trail markings, and exposure; adjust gear and fitness expectations accordingly for a safe, free‑spirited journey.
Identify Permit Requirements and Regulations
After you’ve mapped the terrain and figured out how far and steep the route will be, the next step is to sort out the permits and regulations that apply to every segment of your trip.
Check PA ReserveAmerica for state‑park permits, note that primitive camping is banned in parks but allowed in most forests except William Penn, and verify national‑park deadlines—Grand Canyon four months ahead, John Muir 24 weeks, Smokies 30 days—while remembering to carry and display each permit when asked.
Create a Camping Trip Gear Inventory and Plan a Two‑Week Test‑Run
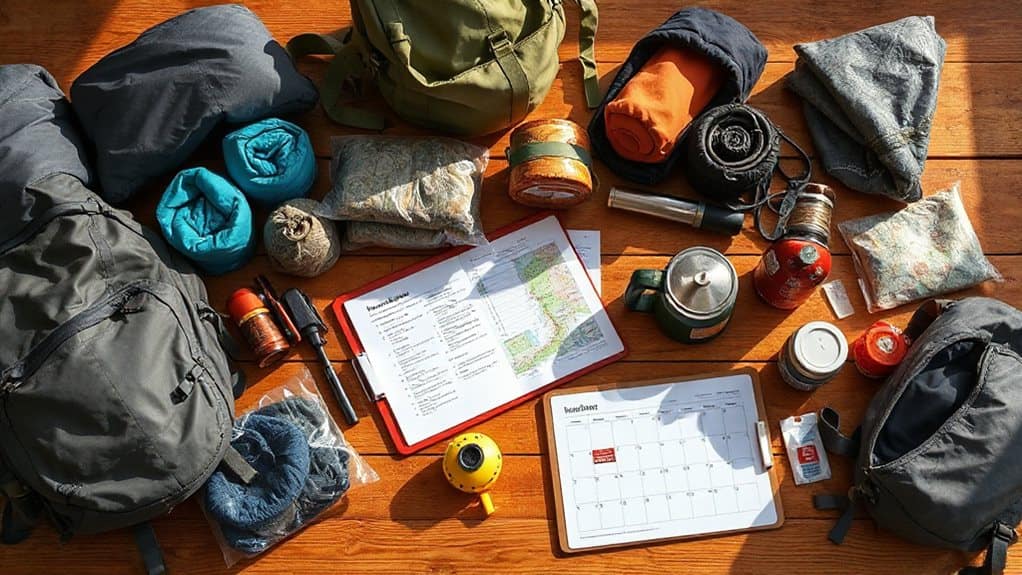
When you start building your gear list, focus first on the core campsite essentials—tent, sleeping bag, pad, pillow, headlamp, lantern, chairs, and a camp table if a picnic table isn’t available—then add the often‑overlooked stakes, footprint, extra batteries, and a multi‑tool.
Group items into campsite, kitchen, tools, clothing, and sleep categories, pack a two‑week test‑run, note redundancies, and adjust for comfort, weather, and trip type before finalizing.
Also be sure to include a reliable backpack (40–75 L) for carrying your gear and consider a rain cover for wet conditions.
Draft a Camping Trip Meal Plan and Build a One‑Week Shopping List
Your gear inventory is set, now it’s time to feed yourself for the whole week.
Sketch a 7‑day menu that rotates three breakfasts, three lunches, three dinners, plus snacks, favoring low‑prep, high‑protein dishes like breakfast burritos, chicken salad, and foil‑packet meals.
List staples—eggs, bacon, tortillas, oats, canned beans, rice, pasta, fresh produce, trail mix, coffee—grouped by meal, and pack pre‑cooked proteins, chopped veggies, and frozen muffins to minimize campsite cooking and ice use.
Align Group Schedules for Camping Trip Coordination
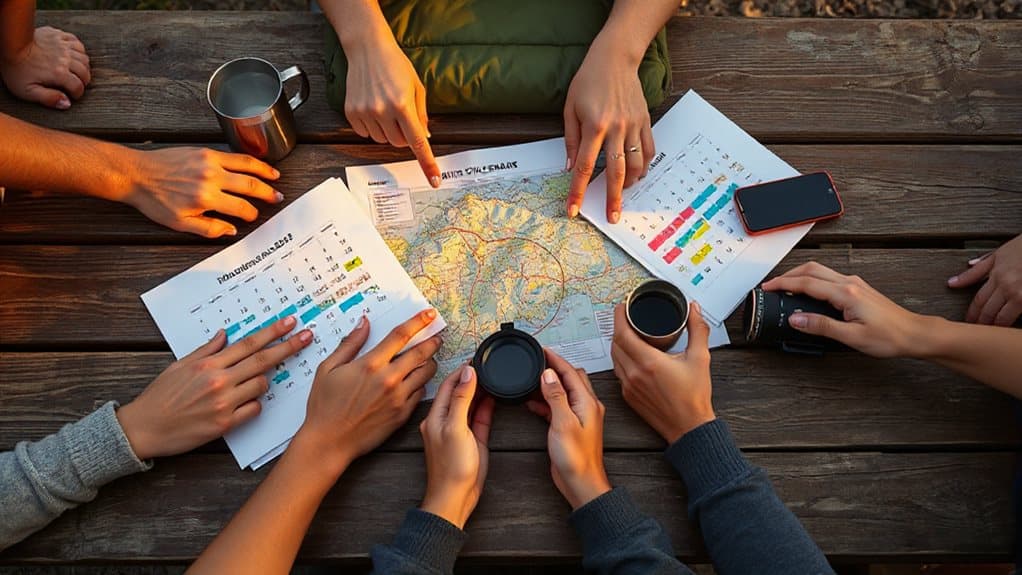
How do you keep a busy group on the same page when planning a camping trip? Start polling early—one to two months ahead—using a shared hub like Google Sheets or Notion.
Identify overlapping weekends, set a firm target date, and lock it in.
Assign roles for meals, gear, and activities, then keep the itinerary loose but visible, updating the document regularly so everyone stays informed and free to enjoy the outing.
Prepare Camping Trip Safety Essentials and Emergency Protocols
Coordinating schedules gets everyone on the same page; now it’s time to make sure the trip stays safe.
Pack a sturdy shelter, waterproof fire gear, and reliable direction-finding tools, then double‑check your first‑aid kit for bandages, antiseptic wipes, and emergency blankets.
Bring a charged phone or satellite messenger, test headlamps, multi‑tools, and footwear, and rehearse fire‑extinguish and signal procedures before you leave.
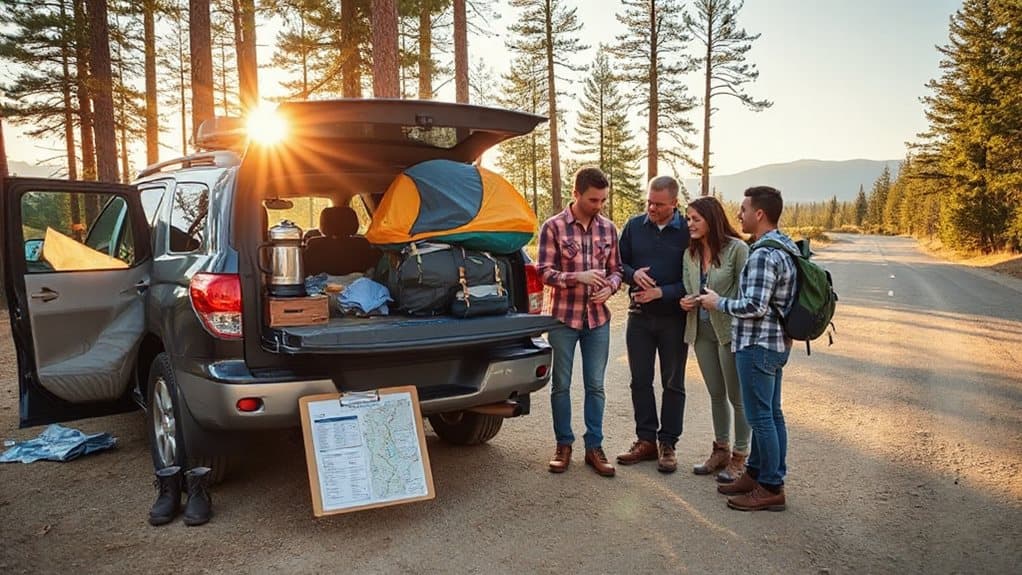
Finalize Your Packing Checklist and Pack the Day Before Departure
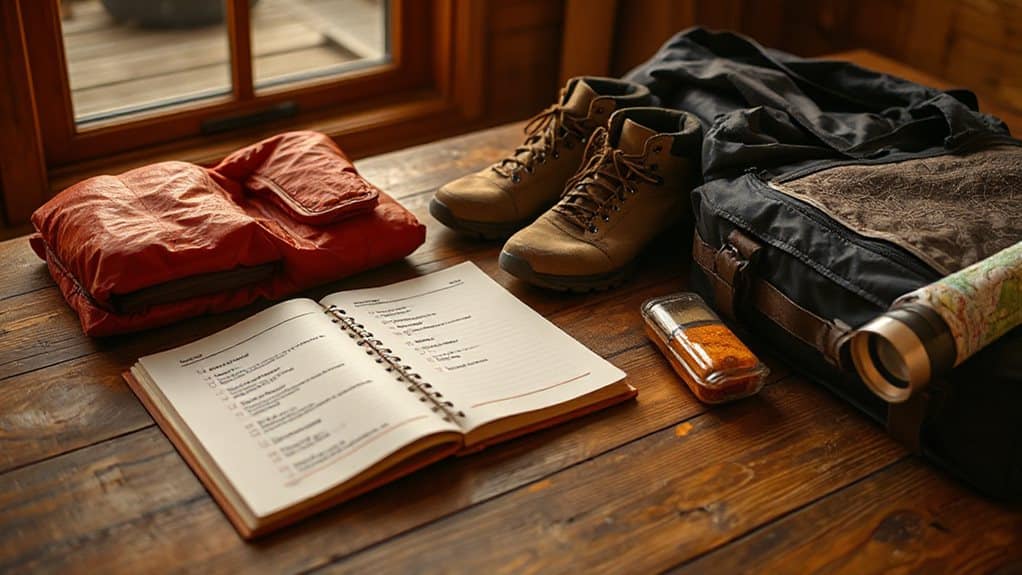
When you’ve already built a lead checklist, the real work begins the night before you leave: gather every item, verify it against your categories, and stage it where you’ll load it onto the car.
Separate essentials—tent, stakes, sleeping bag, stove, fuel, water bottles—from optional gear.
Pack clothing layers, rain gear, hygiene supplies, and organize everything in bins or bags for quick loading.
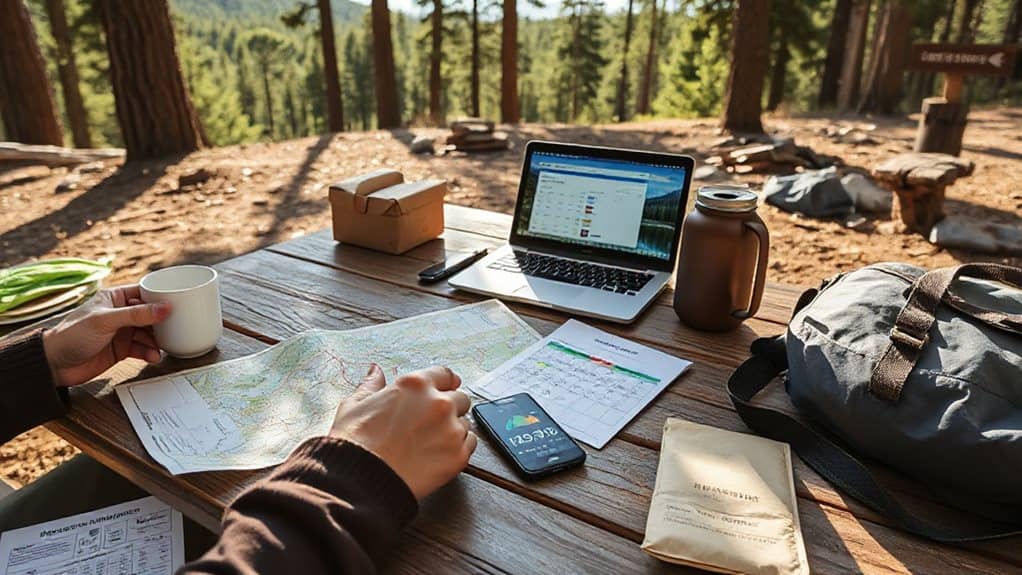
Review Your Camping Trip Plan and Adjust Last‑Minute Timing
Before you head out, run a quick weather check to see if a storm or heat wave could change your plans, then give your gear a final once‑over to confirm everything’s packed and functional.
Double‑check your meal list, making sure you’ve accounted for any dietary needs and that perishable items are properly stored.
If anything looks off, adjust your timing or route now so you won’t have to scramble later.
Check‑Day Weather Check
If you’re about to head out, a quick check of the latest forecast for your exact campsite can make the difference between a smooth night and a scramble for shelter.
Use point‑specific data from the National Weather Service, compare it with nearby town reports, and scan hourly updates for rain, wind, and temperature shifts.
Recheck the morning before departure, adjust arrival time if storms develop, and match surface temperature forecasts to tent‑ground conditions, ensuring comfort and safety.
Gear Re‑Inspection Before Departure
Even a short delay in your departure can give you the chance to double‑check every piece of gear and tweak your timeline, so you arrive at the campsite fully prepared.
Verify tent seams, zippers, stakes, and rainfly; treat waterproofing if needed.
Test sleeping bag loft, pad integrity, and pillow fill.
Inspect stove, lantern, cookware, and fuel.
Confirm headlamps, first‑aid kit, compass, and map case.
Check water filter, backpack zippers, dry‑bag seals, and repair kit completeness.
Final Meal List Confirmation
After you’ve double‑checked every strap, seam, and battery, shift your focus to the meals that will keep the group fueled from the moment you arrive until you pack up to leave.
Review arrival day light fare, pre‑made dinner, breakfast timing, and lunch plans around hikes; prioritize cooler placement for proteins, consume perishable items first, and adjust portions for early departures or extra snacks, ensuring flexibility for weather and last‑minute changes.
And Finally
By following each step—choosing the right trip type, meeting reservation deadlines, securing permits, mapping routes, testing gear, syncing schedules, preparing safety plans, and packing methodically—you’ll minimize surprises and maximize enjoyment. This structured approach gives you confidence, keeps costs in check, and guarantees you’re ready for any terrain or weather. Stick to the timeline, double‑check details before you leave, and you’ll experience a smooth, well‑organized camping excursion.


