Choose a hard‑sided cooler with thick insulation—like a Canyon Outfitter 55 V2 or Yeti Roadie 60—pre‑chill ice blocks and gel packs for at least 24 hours, then layer ice at the bottom, place frozen bottles or blocks on top, and fill gaps with cubes to eliminate air pockets. Pack perishables in airtight containers, keep raw meat sealed separately, and store non‑perishables on the lid for easy access. Shade the cooler under a 90 % cloth tarp, drape a reflective mylar blanket over it, and seal any lid gaps with duct tape. Hang food safely using a sturdy branch and nylon rope if bear‑proof gear isn’t available, and keep your campsite clean by packing out waste and maintaining catholes far from water. Follow these steps and you’ll extend cold retention, protect food from wildlife, and stay organized throughout your trip.
TLDR
- Choose a hard‑sided, well‑insulated cooler (e.g., Canyon Outfitter 55 V2) and pre‑chill it; keep ice blocks at the bottom and top for maximum cold retention.
- Layer perishables in airtight containers or vacuum‑seal bags, placing raw meats on the ice layer and ready‑to‑eat foods above to avoid cross‑contamination.
- Shade the cooler with a 90 % cloth tarp and cover it with a reflective Mylar blanket or Reflectix; add closed‑cell foam panels around the lid and seal gaps with duct tape.
- Use bear‑proof containers or hang food 10–15 ft off the ground on a sturdy branch, keeping it 4–8 ft from the trunk and away from sleeping areas.
- Pack out all waste, use reusable containers, and maintain a clean campsite with catholes ≥200 ft from water sources and regular gear inspections.
Pick the Best Cooler for Your Camp Food Storage Needs

Where should you start when choosing a cooler for your campsite? Look at insulation first—hard‑sided models like Canyon Outfitter 55 V2 keep ice below 40°F for five days, while Yeti Roadie 48 offers premium performance and wheels for easy transport. If weight matters, Coleman Xtreme 50 stays light at 12.5 lb. For budget soft‑sided options, REI Trailgate 30L holds 12 cans and costs less than Yeti. Choose based on capacity, durability, and price to match your freedom‑focused journey. The Yeti Roadie 60 offers the most rugged durability, withstanding standing and jumping on top without leaks. The Colorado River offers a wide range of trip lengths and conditions to consider when planning how much food to pack.
Pack Your Cooler for Maximum Cold Retention
Start by placing all frozen items at the bottom, then seal everything in airtight bags to keep moisture out and stack the remaining food on top of a thick ice layer.
Keep the cooler in the shade, using a tarp or reflective blanket, and add extra insulation like a sleeping‑bag blanket or a foam pad underneath.
This simple layering, sealing, and shading combo maximizes cold retention and keeps your provisions safe all day. A good practice is to rotate and monitor moisture during drying or curing stages to prevent spoilage and maintain optimal preservation.
Layer Frozen Items First
If you place frozen foods at the bottom of your cooler, you create a solid “ice block” that keeps the entire pack cold for longer, because cold sinks and the frozen items act as a thermal reservoir. Lay a thick ice layer first, then set frozen meats, soups, and water bottles directly on it. Add another ice tier above, then stack refrigerated items, filling gaps with cubes to eliminate air pockets. This layered approach maximizes cold retention while you stay free to investigate.
Seal With Airtight Bags
Ever wondered why your cooler stays cold longer when you pack it with airtight bags? Vacuum‑seal removes air, blocking oxidation and moisture, so food stays fresh and odor‑free.
Heavy‑duty plastic or silicone bags shrink your portions, fitting neatly in the cooler and reducing wasted space.
Reusable silicone cuts waste, while sturdy seals keep mold out and preserve flavor, letting you enjoy freedom on the trail.
Shade Cooler, Insulate Further
Why settle for a cooler that loses its chill in a few hours when you can turn it into a portable refrigeration unit? Wrap the cooler in a wet, light‑colored towel for evaporative cooling, then add a 1.5‑inch closed‑cell foam panel on walls, lid, and base, sealing edges with duct tape. Finish the lid with double‑reflective Mylar or spray foam, and cover the exterior with a Reflectix cozy for maximum heat deflection.
Use Ice Packs and Freezer Blocks Effectively
How do you keep your meals cold and fresh all weekend without a fridge? Pre‑chill gel packs for at least 24 hours, store them flat, and cool the cooler beforehand. Place packs on top of food, then around sides and bottom, using flexible gels to fill gaps. Fill the cooler completely, limit openings, and add extra packs for multi‑day trips, keeping everything below 40 °F. Consider adding natural repellents like citronella candles to the campsite to help keep mosquitoes away.
Organize Perishables by Temperature Zones for Efficient Camp Food Storage
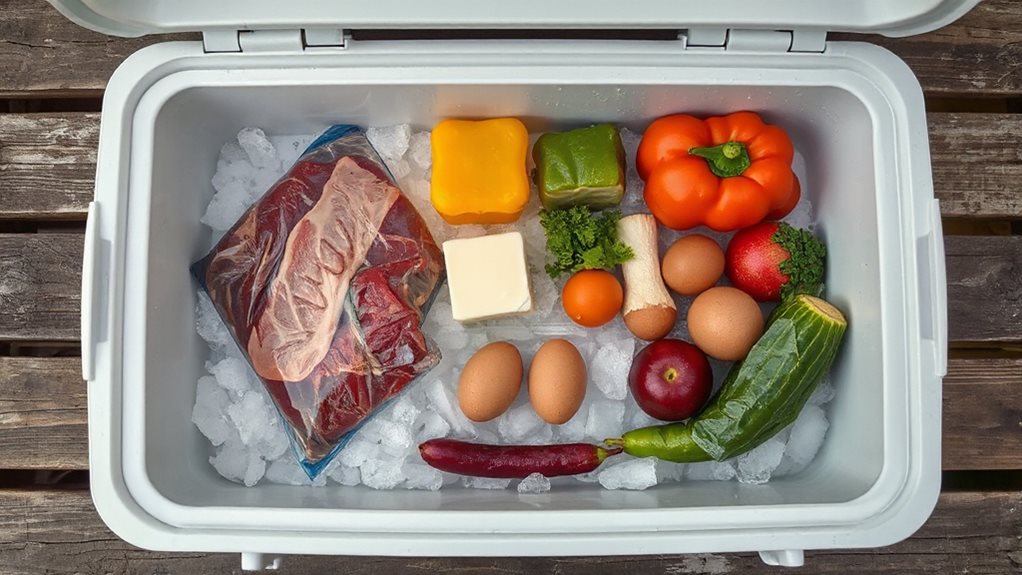
Place the cold‑zone items at the bottom of your cooler, where the ice stays thickest and the temperature stays at or below 40°F, then stack the mid‑zone refrigerated foods just above them so they stay cool without getting soggy.
By separating raw meats, dairy, and leftovers into these two layers, you reduce cross‑contamination and keep everything in the safe range longer.
Keep a thermometer handy to verify the bottom stays cold and the mid‑zone stays within the 40°F‑70°F window, and adjust ice packs as needed.
Also, share your trip plan and check‑in schedule with a trusted contact to help ensure safety while camping share itinerary.
Cold‑Zone Bottom Placement
Ever wonder how to keep your meals fresh longest on a weekend trek? Place ice blocks or frozen water bottles at the cooler bottom, wrapped in trash bags to catch leaks, and drain meltwater often.
Pack raw meats, dairy, and other perishables directly on the ice, sealed in airtight containers. Keep the cooler shaded, slightly elevated, and avoid overpacking the bottom to maintain airflow and optimal cold retention.
Mid‑Zone Refrigerated Items
After securing your ice blocks at the cooler’s bottom, turn your attention to the middle tier where most of your ready‑to‑eat perishables belong. Pack cheese, sliced fruit, and pre‑cooked meals in sealed bags, keep them tightly together to block warm air, and use a thermometer to confirm the zone stays at 40°F or below. Rotate items so you eat the most perishable first, and separate raw meat in a lower compartment or a different cooler to avoid cross‑contamination. This organization maximizes safety while preserving the freedom to enjoy fresh food on the trail.
Store Non‑Perishables on Top for Easy Access
What’s the easiest way to keep your snacks and meals within arm’s reach while still protecting them from the elements? Stack lightweight, water‑resistant plastic containers or crates on top of your gear, using built‑in handles for quick lifts.
In bear country, bolt a metal bear box at ground level and keep the top shelf stocked with dry foods, spices, and utensils. This arrangement lets you grab essentials without unpacking, stays organized, and keeps wildlife at bay. Schedule biannual deep cleanings to remove residues and inspect storage for wear, especially seams and closures, to maintain reliability and food safety with regular inspections.
Seal Perishables in Airtight Containers for Reliable Camp Food Storage

Keeping your perishables fresh on the trail hinges on sealing them in airtight containers that won’t leak, lose temperature, or crumble under rough handling. Choose YETI or Klean Kanteen jars for 100% leakproof, double‑wall vacuum seals that keep soups hot and salads cold for hours.
Opt stainless stainless‑steel Rise boxes with removable dividers for flexible portioning, and pack a 2.8 oz snack box for quick fruit or dip access. These durable, BPA‑free, dishwasher‑safe options protect food while you stay free to explore.
Keep Food Away From Wildlife With Bear‑Proof Solutions
You’ll want to use a bear‑proof container or a sturdy hanging system to keep food out of wildlife’s reach, and the best options are hard‑sided canisters, soft‑sided bags, or metal lockers that lock securely.
When you hang food, suspend it at least 10‑15 feet off the ground and 4‑8 feet from the trunk, using a rope, carabiners, and a trekking pole to keep it stable and out of a bear’s grasp.
Combining a reliable container with proper hanging distances protects your meals, reduces scent, and ensures the critters stay far from your campsite.
Bear‑Proof Food Storage
Ever wonder how to keep your meals safe from curious bears while you’re out in the backcountry? Use hard‑sided canisters like BearVault BV450, which meet IGBC standards, resist claws, and stay on the ground 100 yards from camp.
Soft‑sided Kevlar bags work too, but seal seams and add odor‑proof liners.
Portable electric fences or metal lockers add extra security when available.
Hang Food Safely From Trees
A good tree‑hang setup starts with picking the right tree—ideally a sturdy, deciduous or pine specimen with a branch at least 15 feet off the ground and a trunk at least 200 feet from your tent.
Use a 50‑ft nylon cord, clip your Ursack with a carabiner, toss the rope over a 20‑ft branch, hoist the bag to 12 ft, pull it 6 ft out, and tie off securely. This keeps food out of wildlife reach while you enjoy freedom.
Hang Food Safely Without Bear‑Proof Gear
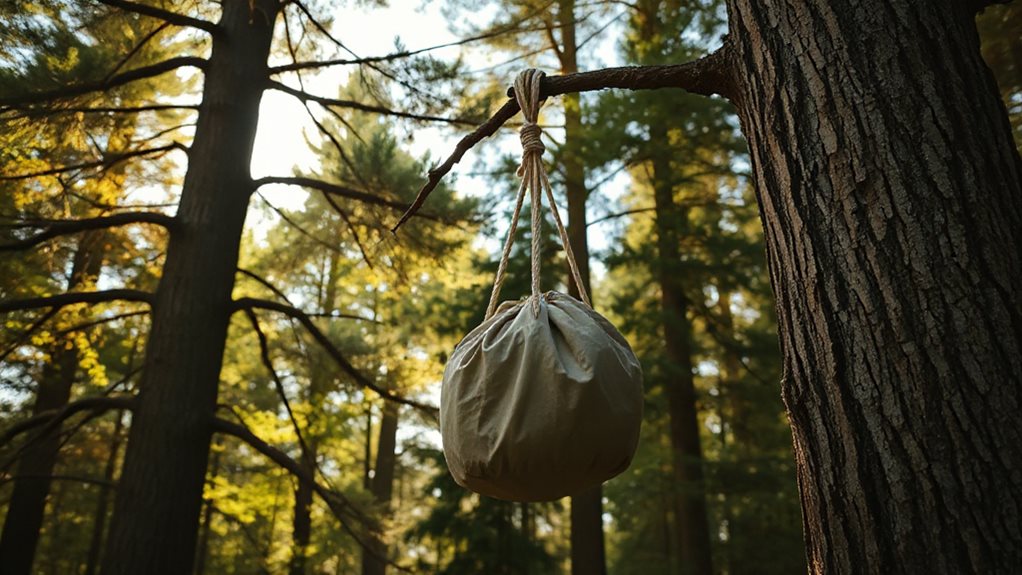
How can you keep your meals safe from curious bears when you don’t have a bear‑proof container?
Choose a sturdy branch 15‑20 feet high, 4‑6 inches thick, and 4‑6 feet from the trunk, then toss a ½‑inch nylon rope over it.
Clip a mini carabiner to your food sack, pull it up to at least 12 feet, and secure a toggle or stake to hold the bag midway.
Keep the setup 200 feet from sleeping areas and downwind.
Shade and Insulate Your Cooler for Extra Hours
What’s the simplest way to stretch your ice for hours longer? Shade your cooler under a 90% cloth tarp, then drape a reflective mylar blanket or Reflectix bubble wrap over it to bounce radiant heat away.
Add a closed‑cell foam panel or EVA strip to the lid, seal gaps with duct tape, and place a fleece or sleeping‑bag blanket around the sides for extra insulation.
Keep Your Campsite Clean and Waste Under Control

Ever wonder how a tidy campsite can protect both nature and your own comfort? Pack out everything you bring, use reusable containers, and refuse excess packaging.
Set up clear recycling stations, separate cans, bottles, and soft plastics, and follow local compost rules—bury scraps or seal them for transport.
Keep catholes 200 feet from water, use biodegradable soap, and schedule quick clean‑ups to maintain freedom‑friendly, low‑impact camping.
Plan Meals to Optimize Camp Food Storage and Reduce Waste
Why not start your trip with a solid meal plan that lets you pack only what you’ll actually eat, cutting down on both bulk and waste? Map each lunch and dinner, skip “just in case” items, and use reusable spreadsheets. Choose one‑pot dishes, bulk‑portion veggies in mason jars, dehydrate snacks, and seal leftovers in silicone bags. This precision cuts containers, saves weight, and eliminates waste.
Final Note
By choosing the right cooler, packing it smartly, and using ice packs or freezer blocks, you’ll keep perishables fresh longer. Organize foods by temperature zones, store non‑perishables on top, and— when needed—hang items safely without bear‑proof gear. Shade and insulate the cooler for extra hours, keep the campsite clean, and plan meals to minimize waste. Follow these steps, and your camp food will stay safe, tasty, and ready for every adventure.


