Find a flat, dry spot and clear debris, then pick sturdy saplings or straight branches for the frame; cut a thick ridge pole, lash the side supports with paracord using clove hitches and square‑lash, and secure the base with stones or a shallow trench. Drape a tarp over the ridge, tension it with a trucker’s hitch and taut‑line hitches, and seal the edges with rocks, stakes, and debris. Layer moss, pine boughs, and grass inside to insulate, keep the entrance on the wind‑protected side, and add a simple stone fire pit for warmth; the next steps will show you how to refine the seal and improve comfort.
TLDR
- Choose a flat, dry site, clear debris, and mark the perimeter with rope or stones for a stable foundation.
- Build a sturdy frame using straight, dry branches or logs; secure ridge poles with clove hitches and square‑lash lashing.
- Cover the frame with a tarp or layered natural insulation (moss, pine boughs) and tension edges using stakes, rocks, and guy lines.
- Anchor the shelter to solid trees or rocks, employing bowline and trucker’s hitch knots for adjustable, even tension.
- Seal the entrance on the wind‑protected side, closing gaps with debris, hides, or trash‑bag flaps to retain heat and block drafts.
Choose the Right Survival Shelter for Your Terrain
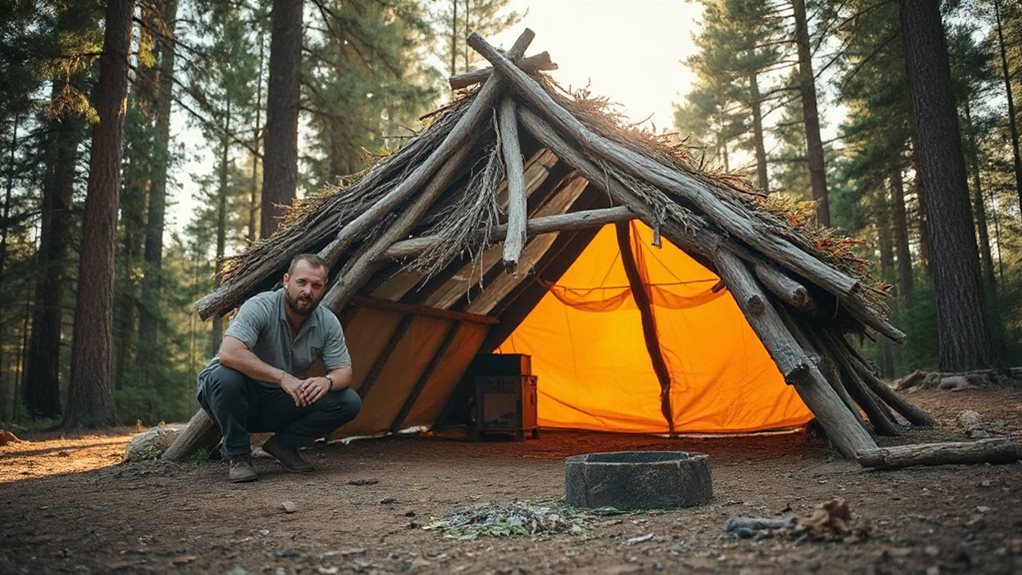
Where are you camping, and what conditions will you face? You’ll pick a lean‑to on flat forested ground, using nearby trees for support, or an A‑frame if you need ridge‑pole stability. Consider planning ahead and packing the 10 essentials to ensure safety and minimize impact. In snowy terrain, a quinzhee or A‑frame handles deep snow loads. Rocky sites call for lean‑tos attached to outcrops, while windy plains favor tarp A‑frames with steep roofs. Choose the shelter that matches terrain, resources, and weather. Insulation is essential for maintaining body heat in cold environments.
Select the Most Effective Natural Materials for Insulation and Structure
Branches, logs, and dead wood form a sturdy structure, with straight, dry pieces bearing the weight of roof and insulation layers, while standing saplings can be cut into ridge poles or A‑frame supports.
Use thick branches for ridge poles, dead wood for the frame, and layer moss, pine boughs, grass, or ferns to trap air, seal gaps, and keep the interior dry and insulated.
Some rare animals, like the Mangrove Pit Viper, can command extremely high prices due to their scarcity and desirability.
Gather and Prepare Tools, Rope, and Lashing Materials
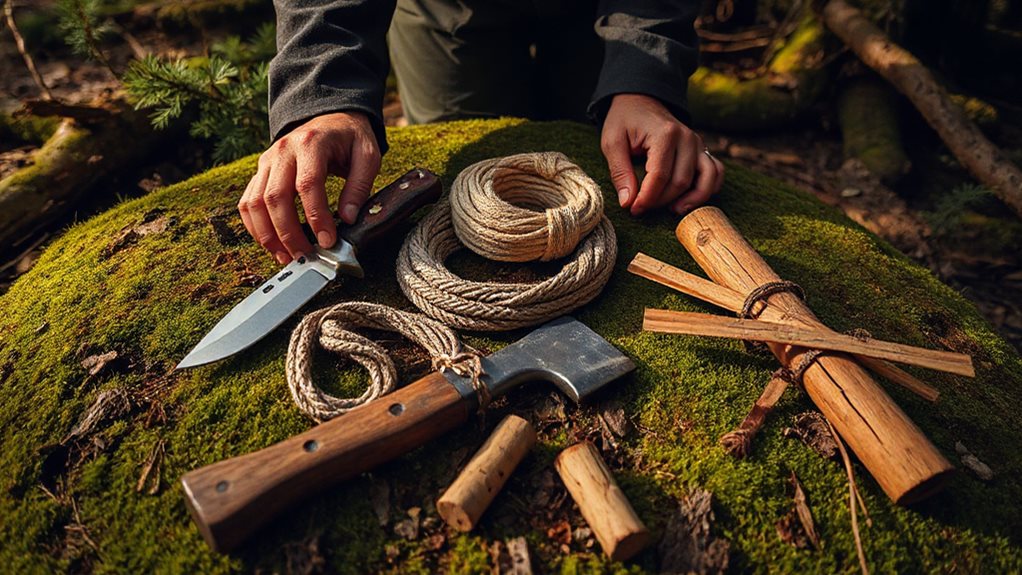
You’ll want to bring a sturdy rope—paracord for strength and bank line for tighter knots—plus a few natural lashing options like grass stems or cattail leaves for when synthetic cord runs out.
Choose a basic set of tools: a fixed‑blade knife for carving, a compact axe or hatchet for chopping, and a folding saw for precise cuts, ensuring each fits comfortably in your pack.
With these essentials in hand, you can start assembling frames, binding joints, and securing shelter walls quickly and reliably.
Also, be sure to inspect poles regularly to catch dents or cracks early and prevent gear failure.
Essential Rope Types
A solid shelter starts with the right rope, and choosing among paracord, tarred bank line, bungee cords, climbing rope, and natural cordage lets you match strength, flexibility, and weight to the task at hand.
Paracord offers 550‑lb strength for ridgelines, but its inner strands tangle.
Tarred bank line holds knots longer and adds value per foot.
Bungee cords tighten themselves, cutting knot work.
Climbing rope resists tension for top lines.
Natural cordage binds like velcro, yet needs special hitches, especially when wet.
Natural Lashing Techniques
Paracord’s strength and flexibility get you far, but the real work begins when you gather the natural tools and materials that will hold your shelter together. Select 7‑9 sturdy branches, 4‑inch logs, and peel bark for extra binding; strip paracord’s inner strands, keep the outer sheath for tight lashings. Start each pole with a clove hitch, then square‑lash using an over‑under pattern, adding frapping turns for rigidity. Trim branches for snug fits, protect bark from bite‑through, and finish with half‑hitches to lock everything in place.
Tool Selection Basics
Choosing the right tools before you start building saves time and frustration, so gather a fixed‑blade camping knife for clean cuts, a folding saw for trimming branches, and a compact entrenching shovel to dig a solid base; a lightweight hatchet or M9 bayonet knife adds chopping power for larger logs, while a headlamp keeps you productive after dark.
Pack paracord, nylon rope, and twine for secure lashings, and bring a tarp or emergency blanket for shelter covering, ensuring each item fits your pack and supports a free, efficient build.
Build a Stable Foundation and Mark the Perimeter

Pick a flat, dry spot and clear any debris so the ground stays level and water runs off.
Stretch a rope around the outline, keeping it a few inches beyond your body’s footprint to define the perimeter.
Then jam stones or logs into the rope’s edges, tightening them to lock the shape in place and give the foundation a firm, stable base.
Ultralight shelters prioritize weight savings which often involves tradeoffs in durability and weather protection.
Choose Dry, Level Ground
Finding flat, dry ground before you start building a shelter is essential because a stable foundation keeps the frame from shifting and prevents water from pooling inside. Scan the area for gently sloping, rock‑free spots away from streams, clear loose vegetation and debris, and verify that the soil holds your weight plus your gear. Choose a location with nearby fallen logs for ridge poles, and keep wind‑breaks in mind for comfort.
Mark Perimeter With Rope
How do you define the exact limits of your shelter before you start building? Stretch a lightweight paracord around the site, anchoring it to trees or stakes at waist height. Use a bowline or taut‑line hitch for quick adjustments, keeping the rope a few inches inside half its length. Mark corners sharply, tighten stakes, and check tension; this clear perimeter guides your foundation and keeps your freedom intact.
Secure Edge With Stones
What’s the most reliable way to lock your shelter’s edge in place before you start building the walls?
Dig a 6‑inch trench along the perimeter, add a gravel bed if soil’s soft, then sort rocks by size. Lay two uniform rows of shaping rocks, leave gaps for filler, and insert tie stones every few feet, staggering joints. Finish with flat capstones and a mortar bead for stability.
Construct an A‑Frame or Lean‑To Frame With Saplings

Where you place your shelter matters as much as how you build it, so start by scouting a flat, uplifted spot that’s clear of dead trees, rocks, and low‑lying debris, and that faces away from the prevailing wind.
Then bind a ridgepole between two sturdy trees, lean saplings into an A‑shape, secure them with cordage, and add diagonal posts for side walls.
Use additional branches for a lean‑to roof, spacing them evenly, and bind everything with natural ties for a sturdy, wind‑protected frame.
For cold-weather trips, prioritize a site that avoids avalanche-prone areas and provides reliable wind protection.
Build Wigwam or Debris Hut Walls for Extra Insulation
Ever wondered how to turn a simple frame into a warm, weather‑proof shelter? Lay lightweight ribs a foot apart, add cross‑pieces, then pack three‑plus feet of dry leaves, grasses, or needles against them, overlapping to block moisture.
Keep the doorway small, fill interior gaps with compressed debris, and ensure ribs stay below the ridge pole to avoid leaks. This creates thick, insulating walls that hold heat even below zero.
Layer Leaves, Pine Boughs, and Moss for a Waterproof Survival Shelter

After you’ve built the basic wall structure, the next step is to add a waterproof skin using leaves, pine boughs, and moss. First, drape pine boughs over the frame, overlapping from bottom up and staking them for stability. Then, lay moss in shingle‑like rows, tucking each piece under the one above, packing it thickly to seal gaps. Finally, spread an eight‑inch leaf bedding over the boughs, filling minor spaces and adding insulation, while ensuring eaves overhang to keep water out. This layered approach creates a durable, rain‑proof shelter that lets you stay free in the woods.
Put Up a Tarp or Canvas to Keep the Wind Out
First, locate sturdy anchor points—trees or poles—and tie a ridgeline with paracord, making sure it’s taut enough to bear the tarp’s weight.
Next, drape the tarp over the line, pull each corner tight with stakes or rocks, and use extra cords to seal the wind‑blocking edges, creating a snug, angled surface.
Finally, adjust the tension evenly, check that the seams are sealed, and verify that the shelter’s opening faces away from the wind for optimal protection.
Secure Anchor Points
When you choose a spot for your shelter, look for natural windbreaks—trees, hills, or large boulders—so the tarp you’ll hang can lean on solid, wind‑blocking features instead of relying solely on stakes.
Anchor the tarp to sturdy trees or rocks, drive stakes at a 45‑degree angle, add heavy logs or rocks for extra hold, and tie guy lines tightly.
Use branches and pine boughs to reinforce the base, creating a semi‑permeable barrier that deflects gusts while staying light and flexible.
Tarp Tension Techniques
How can you keep the wind out while still setting up a shelter quickly? String a paracord ridge between two trees, bowline one end, trucker’s hitch the other for adjustable tension, then drape the tarp and slide prusik knots through the central grommets to tighten. Add taut‑line hitches at stakes for fine adjustments, using a 2:1 pulley or slip‑loop for extra pull. This keeps the canvas taut, wind‑resistant, and easy to re‑tension.
Wind‑Blocking Edge Seals
After you’ve tensioned the tarp with a paracord ridge and prusik knots, the next step is sealing the edges so wind can’t slip through.
Hammer ground stakes at angles, then weight edges with rocks or logs.
Tie diagonal guy lines, fill gaps with debris, and use trash‑bag flaps for extra seal.
Position the long edge perpendicular to the prevailing wind, double‑stake critical points, and add bungee cords to reduce stress.
This creates a sturdy, wind‑blocking perimeter while preserving your freedom to move.
Seal the Entrance of Your Survival Shelter to Prevent Drafts
If you position the entrance on the wind‑protected side and keep the opening just large enough to crawl through, you’ll cut most of the convective heat loss right away. Drape hides or thatch over the gap, lash them with cordage, and pack leaves, pine boughs, and debris tightly around the frame. Add a thick, overlapping layer of dry vegetation, tension it with paracord, and test the seal by feeling for drafts before settling inside.
Add a Simple Stone Fire Pit for Warmth Inside the Shelter

Often the most effective way to keep your shelter warm is to add a simple stone fire pit right inside the space, and you can build it with just a few basic steps. Choose a level, open site 10‑25 feet from flammable material, then excavate 6‑8 inches, tamp, and lay a gravel base. Stack fire‑rated stones in staggered rows, insert a fire ring, line the interior with fire bricks, and surround the pit with a three‑foot gravel pad for safety and airflow.
Final Note
By choosing the right shelter type, gathering natural insulation, and building a sturdy frame, you’ll create a reliable refuge in the woods. A solid foundation and well‑lashed saplings keep the structure stable, while layered foliage and a tarp provide waterproofing and wind protection. Sealing the entrance cuts drafts, and a simple stone fire pit adds warmth. Follow these steps, and you’ll have a functional, comfortable shelter that meets basic survival needs.


