To spool braided line without tangles, you’ll need to start with 20% monofilament backing at 8–10 lb test to prevent slippage, then feed the braid correctly—counterclockwise off the supply spool for spinning reels, over the top for baitcasters. Apply steady 7–10 pounds of tension using a cloth or specialized tensioner throughout the process, and fill to within 1/16 inch of the spool’s edge. The techniques that follow address knot selection, line lay inspection, and maintenance strategies that keep your setup tangle-free for the long term.
TLDR
- Add 20% monofilament backing before spooling braid to prevent slippage on the arbor and ensure secure attachment.
- Maintain steady 7–10 pounds of tension throughout spooling using cloth, tensioners, or digital scales for consistent pressure.
- Feed line correctly: counterclockwise off supply spool for spinning reels, over the top for baitcasters to prevent twists.
- Use Double Uni Knot for spool attachment and moisten before cinching to reduce friction and ensure secure connections.
- Perform test casts after spooling to seat line properly and adjust spool washers if uneven distribution occurs.
Selecting and Preparing the Right Backing Material
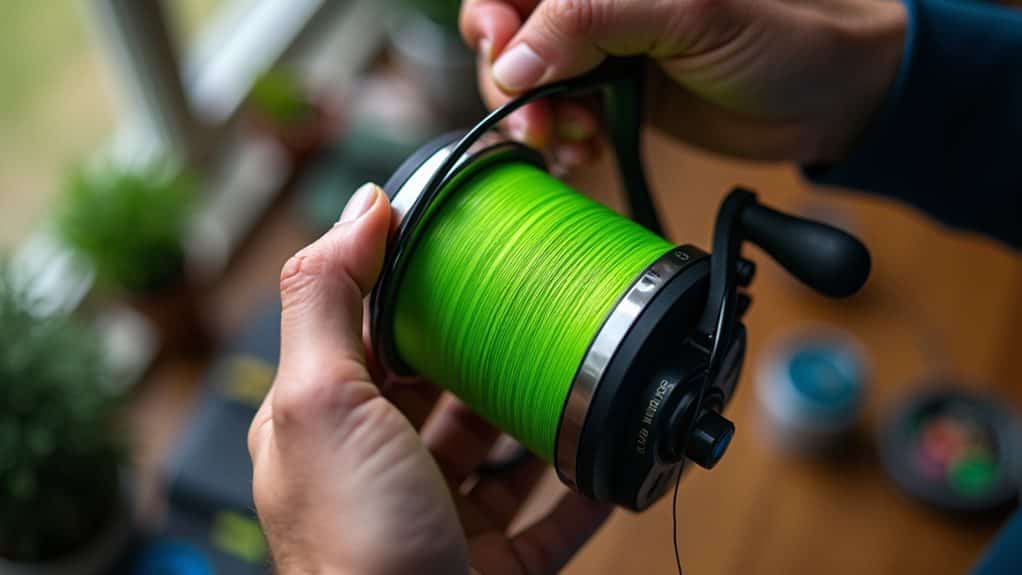
Before you start spooling braided line onto your reel, you’ll need to make an important decision about backing material. Monofilament backing, typically 8-10 lb test, works well for most spinning reels and prevents braid from slipping on the arbor.
You’ll want at least two passes around the spool. Alternatively, gel spun braided backing offers superior strength-to-diameter ratio, increasing your reel’s line capacity markedly. Choose mono with a diameter around .016–.018 to provide adequate bulk as filler on the arbor. Many kayak anglers also prefer backing that includes a built-in GPS for marking productive fishing spots and navigation.
Understanding Spooling Direction for Your Reel Type
Getting the spooling direction right makes all the difference between smooth casts and a frustrating tangle of line on your next fishing trip.
For spinning reels, make certain your line comes off the supply spool counterclockwise to prevent twists.
Baitcasters need line feeding over the top, matching the reel’s rotation.
After fifteen cranks, check for twists—if they appear, flip your supply spool immediately.
Since braided line has no memory, it won’t twist regardless of whether you use the flat or upright spool method.
For longer trips, mark and save your best spots using waypoints so you can return without wasting time.
Mastering the Proper Tension Technique
Getting the tension right during spooling is the single most critical factor in preventing tangles, line memory, and casting problems with braided line.
You’ll need to apply a steady 7–10 pounds of pressure throughout the entire process, which you can achieve with a simple cloth, specialized tensioners, or other tools we’ll cover shortly.
The good news is that mastering this technique isn’t difficult once you understand what causes loose coils, recognize the signs of incorrect tension, and know exactly how to maintain consistent pressure from start to finish.
A reliable practice is to first add monofilament backing to the spool (about 20% capacity) to prevent braid slippage before you begin spooling.
Why Tension Matters Most
While many anglers focus on choosing the right braided line or perfecting their knots, tension control during spooling often separates a frustration-free fishing experience from a tangled nightmare.
Proper tension compacts braid tightly onto your spool, preventing loose wraps that dig into themselves during casts. Without it, you’ll face backlashes and wind knots. Consistent pressure simulates actual fishing conditions, ensuring reliable performance when it matters most.
Tools for Consistent Tension
Achieving consistent tension during spooling doesn’t require expensive equipment, though the right tools unquestionably make the job easier.
A simple folded baby wipe gripped around the braid provides excellent friction for finger tensioning. For precision, digital scales measure exact pounds of pressure applied. Dedicated line spoolers with adjustable tension bands offer mechanical control, while their multi-position clamps stabilize various reel sizes throughout the process.
Avoiding Common Tension Mistakes
Having the right tools at your disposal sets the stage for success, but knowing exactly how much pressure to apply—and when—separates a perfectly spooled reel from one that’ll frustrate you on the water.
Target 7 to 10 pounds of tension for baitcasters, mimicking your reel’s maximum drag setting. Avoid excessive tightness causing line stretching or insufficient pressure creating loose packing that invites backlash and wind knots during casting.
Eliminating Line Memory Before You Start
Before you spool braided line onto your reel, you’ll want to address line memory—the tendency of fishing line to retain the coiled shape of its storage spool.
While braided line is less susceptible to memory than monofilament or fluorocarbon, it can still benefit from stretching. Simply tie one end to a sturdy object and pull firmly with a gloved hand for improved casting performance and fewer tangles. Consider checking the drop-offs in your local waters to understand how changes in depth affect how your line behaves when fishing.
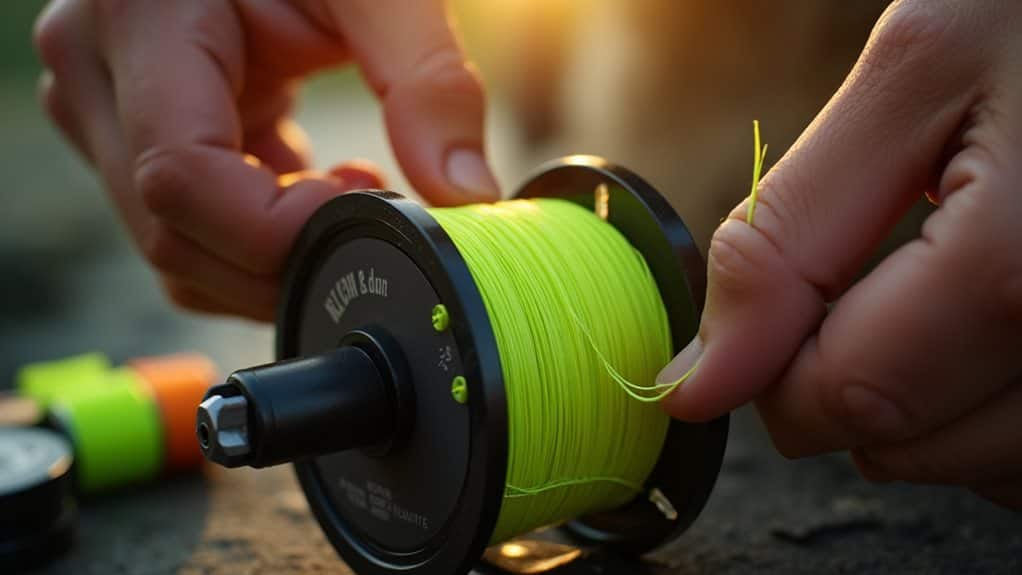
Tying Secure Knots That Won’t Slip
Once you’ve spooled your braided line carefully, the next critical step is securing it with a knot that won’t slip under pressure. Braided line’s slick, low-diameter structure makes it prone to slippage with traditional knots, so you’ll need to choose knots specifically designed for its unique properties, like the Palomar or FG Knot.
Equally important is mastering proper tying technique—moistening the line before cinching, maintaining consistent wrap tension, and seating the knot correctly—to guarantee maximum strength and reliability when you’re fighting fish.
Choosing the Right Knot
Selecting the appropriate knot for braided line makes the difference between a secure connection and a frustrating day on the water marked by lost fish and tangled tackle.
You’ll want the Palomar Knot for terminal tackle, retaining 95% line strength. The Double Uni Knot works best for spool attachment, maintaining 85% strength while preventing slippage through its multiple wraps and turns.
Proper Knot Tying Technique
Tying knots with braided line demands a different approach than monofilament because the slick, thin fibers can slip through traditional knots that work perfectly well with other line types.
You’ll need to use specialized knots like the Palomar, Double Uni, or FG Knot, which retain up to 95% of line strength. Always moisten the line before tightening to reduce friction and heat damage, then test strength by pulling firmly.
Maintaining Consistent Line Flow During Spooling
Consistent line flow stands as the foundation of a successful spooling job, and achieving it requires attention to several key factors working in harmony.
You’ll need to maintain steady tension throughout the process, which you can accomplish with finger pressure or a dedicated tensioning tool.
The line should exit your filler spool in the same direction it winds onto your reel, minimizing twists and ensuring smooth layering.
Avoiding Common Overfilling Mistakes
While maintaining proper line flow sets you up for success, even perfectly tensioned line becomes a nightmare if you pack too much of it onto your spool.
Fill to within 1/16 inch of the spool’s edge—no more. Overfilling causes line to spring off spontaneously, dig into itself under pressure, and jump off guides during retrieval. That small gap prevents spillover while maintaining ideal casting distance.
Setting Up Your Line for the First Cast
Before you make your first cast, you’ll need to prepare your freshly spooled braided line through a few simple settling techniques that prevent immediate tangles and guarantee smooth performance on the water.
Test casting allows the line to seat properly on the spool while revealing any tension issues that need correction, and making final adjustments now saves you from frustrating backlashes later.
These preparatory steps take only a few minutes but make the difference between a successful fishing session and a day spent untangling line.
Test Casting and Settling
After spooling your reel with fresh braided line, it’s tempting to head straight to the water, but taking time to test cast and settle the line properly can save you from frustrating tangles and backlashes during your actual fishing trip.
Make several smooth casts with varying lure weights, watching for consistent line release without loops or digging. Adjust your reel’s spool tension if you notice overrun, and fine-tune your casting form to prevent wind knots.
Final Tension Adjustments
Your test casts have revealed how your freshly spooled braid performs under real conditions, and now it’s time to make final tension adjustments that’ll set you up for success on the water.
Tie a weight or lure to your line and reel tightly against it, removing any remaining slack. Walk away from the reel, maintaining firm tension, then reel back smoothly to compress the braid layers uniformly and eliminate potential tangles.
Testing and Adjusting Line Lay After Spooling
Once you’ve finished spooling your braided line, the real test begins with a careful inspection of how the line sits on your reel.
Look for even distribution across the spool’s width, forming a flat or slightly convex surface. If you notice a conical shape pointing downward or upward, you’ll need to adjust spool washers accordingly to correct the oscillation and prevent casting problems.
Long-Term Line Management to Prevent Future Tangles
While spooling your braided line correctly sets the foundation for tangle-free fishing, maintaining that line properly between trips determines whether you’ll continue enjoying smooth casts or struggle with frustrating knots months down the road.
Store your spooled reels in cool, dry locations away from direct sunlight and temperature extremes. Clean your braided line after saltwater exposure or dirty conditions, applying appropriate line conditioners to maintain slickness and flexibility, which prevents the stiffness that causes future tangles.
Final Note
You’ve now got the essential techniques to spool braided line without tangles, from selecting proper backing to maintaining correct tension throughout the process. Remember, taking your time during setup will save you frustration on the water. Check your line lay regularly, avoid overfilling your spool, and you’ll enjoy smooth casts every time. With these methods perfected, you’re ready to focus on what matters most—catching fish.


