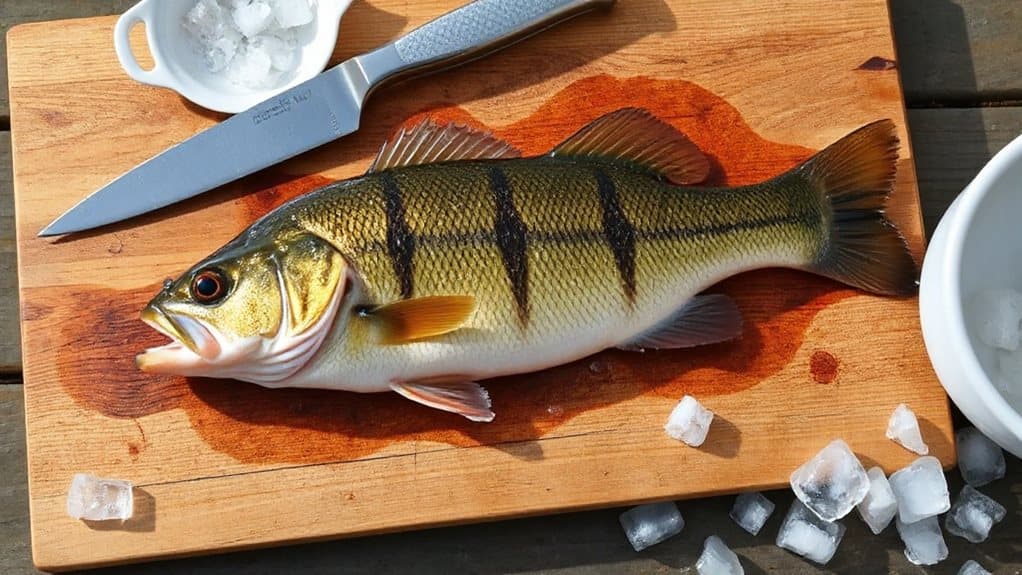
Lay your smallmouth bass on a chilled, non-slip board, head to the left, and secure it firmly. Slide your flexible fillet knife just behind the pectoral fin, angling down to the backbone. Glide the blade along the spine, keeping it flat against the bones, then follow the ribcage to free the fillet. Flip and repeat, then carefully remove the ribcage. Skin the fillet with smooth, steady strokes. There’s a simple trick to avoid dark meat and keep every ounce of clean flesh—knowing it makes all the difference.
TLDR
- Use a 5–7-inch flexible fillet knife like Dexter Narrow or Rapala Classic for precise, smooth cuts.
- Chill the smallmouth bass on ice before filleting to firm the flesh and improve control.
- Start behind the pectoral fin, angling the knife down to the backbone without cutting through it.
- Follow the spine with the blade flat against bone, gliding along ribs to maximize meat retention.
- Skin fillets by placing them skin-side down and slicing at a 45° angle just above the skin.
Set Up Tools and Prep the Smallmouth Bass
Get your tools ready—filleting a smallmouth bass starts long before the blade hits the skin. Grab a 5 to 7-inch flexible blade, like the Dexter Narrow or Rapala Classic, for precise control. Set up your Bass Pro Shops hardwood board with the clamp secure, and have your scaler, shears, and sharpener nearby.
Rinse the bass, then scale it using the dual-edge scaler—this prep guarantees smooth, clean filleting with freedom and confidence. For frequent use, consider a knife with excellent edge retention to maintain sharpness between filleting sessions. Make sure to keep the fish chilled on ice before you fillet to make the process easier and safer cooling on ice.
Position the Smallmouth Bass for Right-Handed Filleting
Lay the smallmouth bass flat on its side with the head to your left and the dorsal fin facing up—this gives you the best control if you’re right-handed.
Position the fish so the pectoral fin is easy to access, and make sure your cutting board is stable to keep everything secure.
Press down near the head with your left hand, then slide your knife just behind the gills to find the starting spot for your first cut. A quick wipe of the rod and attention to the guides after use helps maintain equipment, especially after saltwater exposure, so clean them with warm soapy water and a toothbrush to prevent corrosion and ensure smooth line flow for future trips, see clean guides.
Place Fish On Board
With your cutting board securely in place on a flat, stable surface, position the rinsed smallmouth bass on its side—this sets the stage for a smooth, controlled fillet.
Grip the fish firmly by the lip or back, stroke fins head-to-tail, and secure it with a non-slip towel if needed.
Keep the back facing you, and make certain the fish is stable before cutting.
Position For Right Handed Cut
Now that your smallmouth bass is securely in place on the board, it’s time to set it up for a clean, efficient cut—especially if you’re working with your right hand.
Position the fish on its side, head to your left, backbone parallel to the board’s edge.
Place the pectoral fin within easy reach, tail extending slightly over the board’s end.
This alignment keeps the spine level, gives your knife a clear path, and lets your right hand move naturally from shoulder to tail, reducing strain.
Use your left hand to steady the head, apply light pressure, and guide the blade along the ribs with confidence.
Locate Initial Cut Site
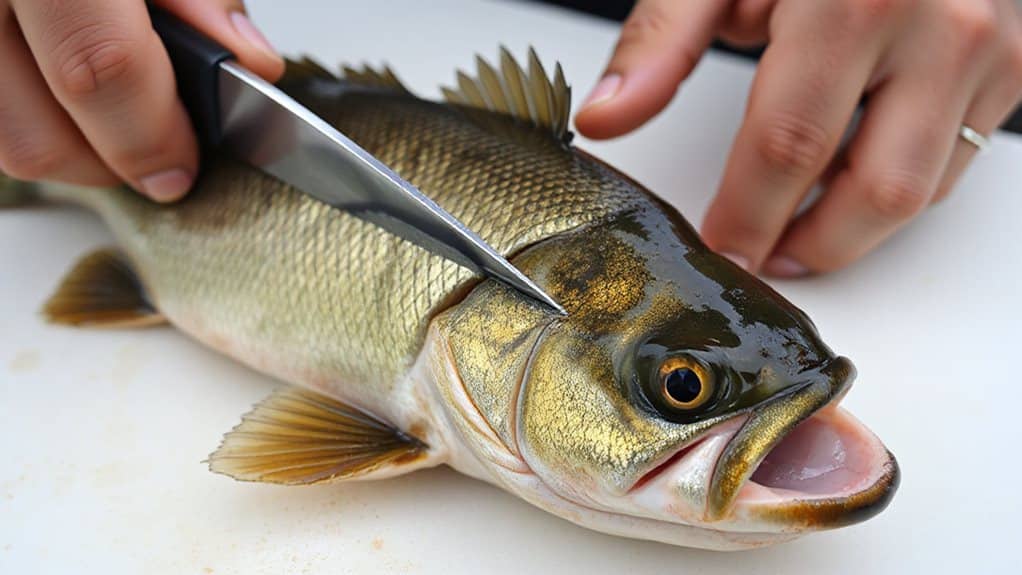
Start by finding the pectoral fin—the triangular flap just behind the gill plate on the fish’s side—since it’s your main landmark for the first cut.
Place your knife just behind it, angling down vertically. Stop when you feel the backbone; that’s one knife-width deep.
This spot avoids the ribs and sets you up perfectly for a clean, controlled fillet.
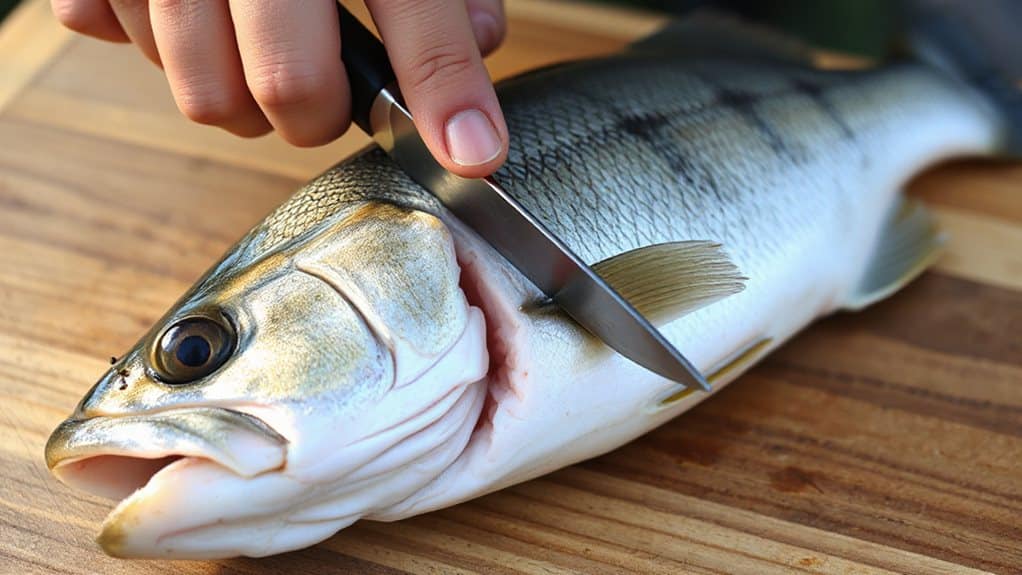
Cut Behind the Gill Plate on a Smallmouth Bass
Slide your knife in just behind the gill plate to begin the filleting process, using the pectoral fin as your guide.
Angle the blade slightly toward the head, about 45 degrees, and cut down to—but not through—the backbone.
Keep the knife flexible and sharp, applying steady pressure while holding the fish firmly under the gills for control and precision.
Rinse the cavity and remove any blood or entrails promptly to maintain freshness and prevent off-flavors; this helps preserve texture and reduces fish smell.
Slice Along the Backbone to Release the Fillet
Once you’ve made the initial cut down to the backbone, it’s time to free the fillet by following the spine from front to back.
Turn your knife so the blade faces the tail, using the flat side against the bone. Apply light pressure, sawing gently while keeping the blade just above the spine.
Feel for ribs, glide along the contour, and cut cleanly to the tail, preserving every bit of meat. Many anglers also rinse and clean their hands afterward using stainless steel or other household methods to remove lingering fish odors.
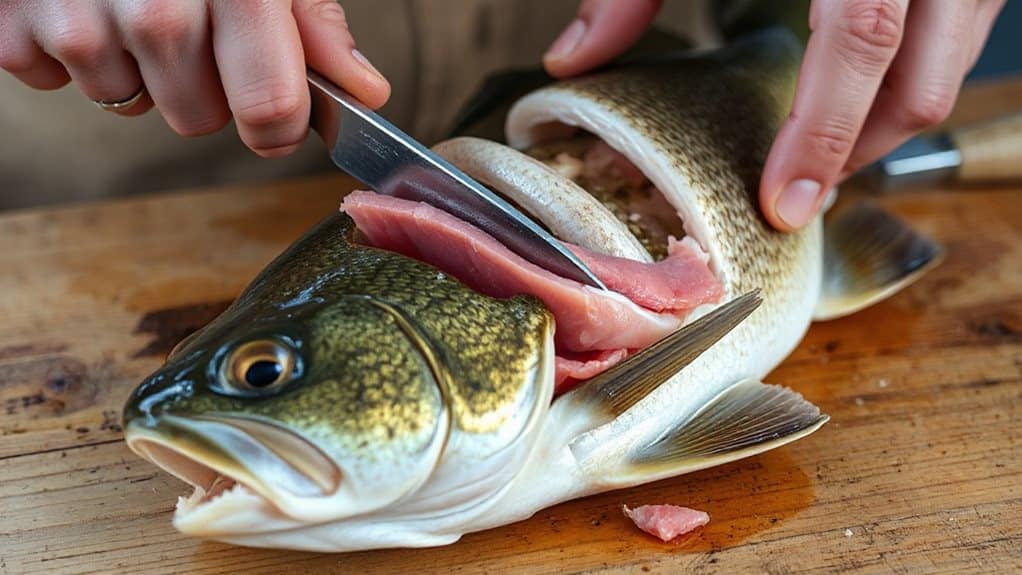
Cut Along the Ribs to Free the Fillet
Now it’s time to free the fillet completely by cutting along the rib cage. Position your blade between the flesh and ribs, keeping it flat and angled slightly upward.
Use a flexible fillet knife to follow the bone’s contour, slicing gently along the full length. Saw through tougher sections, then poke the knife through toward the tail.
Cut down the rib side to fully release the fillet. Consider using a flexible fillet knife to maintain control and feel while working along the bones.
Detach the Fillet at the Tail Without Waste
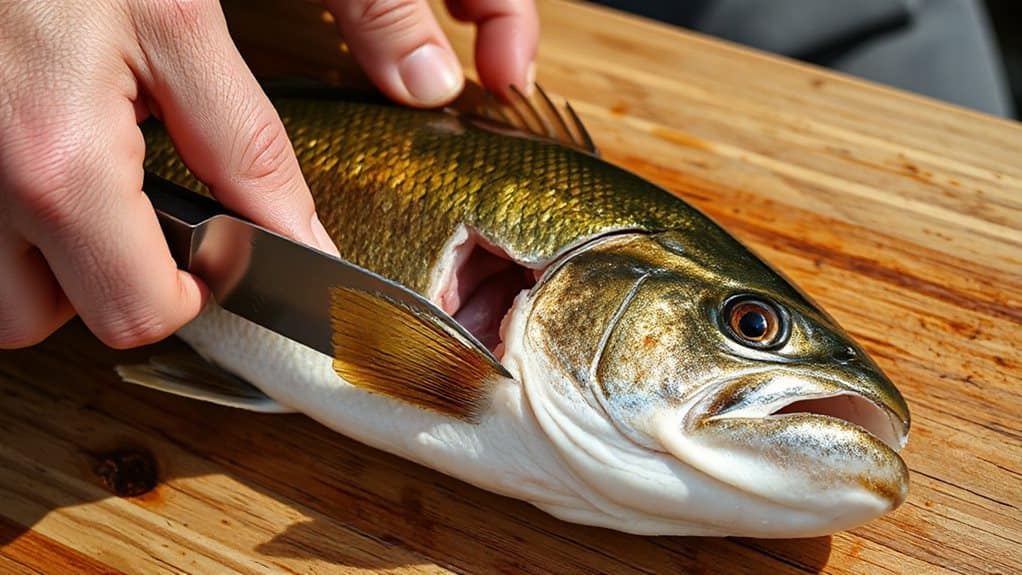
As you near the tail, adjust your approach to make the most of the fillet and leave as little meat behind as possible.
Flatten your knife angle, then turn it horizontally to slice cleanly through the tail flesh. Stay close to the bone, follow the contours, and lift the fillet to check for uncut areas. Pull the meat gently, keep it attached until fully loosened, and use a sharp blade to avoid ragged edges or wasted yield.
Flip the Fish and Repeat on the Other Side
With the first fillet removed and set aside, flip the fish over carefully so the unfilleted side now faces up, placing the completed side down on the cutting board to keep it stable.
Rotate 180 degrees if left-handed. Reinsert your knife behind the pectoral fin, follow the backbone’s curve, and cut cleanly to the tail, keeping the blade above the ribs for a smooth, waste-free fillet.
Remove the Ribcage From the Smallmouth Bass
Slide your fillet knife along the backbone of the smallmouth bass, keeping the blade angled just above the ribcage as you work from head to tail.
Feel for the ribs, then flatten the knife and saw gently toward the belly.
Use needle-nose pliers to pull stubborn bones, and run the blade beneath the ribcage for clean separation.
Finish with shears or a large knife if needed, and clean any remaining bits.
Skin the Smallmouth Bass Fillet Smoothly
Now it’s time to skin your smallmouth bass fillet cleanly and efficiently.
Place the fillet skin-side down, grip it firmly near the tail, and use a flexible fillet knife at a 45-degree angle.
Glide just above the skin, maintaining a 1/16-inch gap to avoid dark meat.
Use light, sawing pressure, angling downward, and work from head to tail for smooth, complete separation.
Skin the Tail Without Wasting Meat
Once you’ve detached the tail, it’s time to focus on removing the skin without leaving precious meat behind.
Slide your knife at a 45-degree angle, following the bone line closely.
Keep the blade against the skin, using light sawing motions.
Flip the fillet and peel the skin away with a 45-degree cut at the tail.
Check for leftover meat and make certain the section is boneless before storing.
Final Note
You’ve got this—filleting a smallmouth bass is easier than you think. With sharp tools and steady hands, follow each step carefully, and you’ll end up with clean, bone-free fillets. Don’t rush the skinning; a smooth pull saves meat. Practice helps, but even your first try should yield great results. Now you’re ready to cook, share, or store your catch with confidence. Happy fishing—and even happier eating.


